Friday, October 12, 2012

Ladybug Ink Blog Hop: Halloween Style

Welcome to the Ladybug Ink Blog Hop! This month's theme is...wait for it....Halloween! 
Personally, I'm not a big fan of Halloween. It was great when I was little. What little kid doesn't like candy, right? Nowadays, it's not as appealing; however since having my little Booger Bug (aka my daughter), some of the appeal is coming back. And then there's the cute Googly Ghouls stamp set and coordinating Ghoulish Googlies Designer Kit that makes prepping for Halloween fun. I'm planning on using this bundle to make treats for the Booger's class and my coworkers.


The Ghoulish Googlies Bundle comes with everything you need to make the bag on the right. I used the Border Banter stamp set and some designer series paper to make the card on the left.

Using the designer kit makes this card super easy. Color scheme: Basic Black, Whisper White, Lucky Limeade, and Pumpkin Pie.

The Ghoulish Googlies kit comes with everything you need to make this adorable bag (except the Chevron embossing folder). To emboss the bag, just put it in the Chevron embossing folder and run it through the Big Shot. It adds a great touch. Fill the bags with candy or other goodies.

Meet the Googlie Cottonball. Put some Googlies on a cottonball and you have a cute little ghost-looking creature.

The Booger really liked Googlie Cottonball. It became her friend for the day. 

Thanks for visiting my blog. Head on over the Cassie's blog and check out her Halloween creation. 

~Cita 

Ladybug Ink Blog Hop

Kim Madrid http://kimsstampsanctuary.blogspot.com/
Nichole Gonzales Jaramillo http://nicholesu.blogspot.com/
Kay Jantz http://ktmyldyandlife.blogspot.com
Liz Kay www.kraftasticmrskay.blogspot.com
YOU'RE HERE!! Carmelita Wasson http://carmenacita.blogspot.com/
Cassie Rogers http://lucyslovelies.blogspot.com/
Ruth Norton http://ruthsstampingcorner.blogspot.com/


Monday, October 08, 2012

Stampin' Claus has come to Town!


Here comes Stampin' Claus! Here comes Stampin' Claus! Right down Stampin' Lane!!

In October!!!

During the month of October, get a FREE Festive Paper-Piercing Pack when you purchase the Ornament Keepsakes Set and Candlelight Christmas Specialty Designer Series Paper.

You can pick from the following options to get this awesome pack.

Item
Description
Retail Value
Special Price
132260
Christmas Gift Pack (wood-mount)
Includes Ornament Keepsakes Set (wood-mount), Candlelight Christmas Specialty Designer Series Paper, Festive Paper-Piercing Pack
$55.85
$47.90
132261 Christmas Gift Pack (clear-mount)
Includes Ornament Keepsakes Set (clear-mount), Candlelight Christmas Specialty Designer Series Paper, Festive Paper-Piercing Pack
$44.85
$38.90
132262 Christmas Gift Pack (wood-mount bundle)
Includes Ornament Keepsakes Bundle (wood-mount), Candlelight Christmas Specialty Designer Series Paper, and Festive Paper-Piercing Pack
$70.85
$62.90
132263 Christmas Gift Pack (clear-mount bundle)
Includes Ornament Keepsakes Bundle (clear-mount), Candlelight Christmas Specialty Designer Series Paper, and Festive Paper-Piercing Pack
$63.85
$55.90


Head on over to my website to make your purchase and get the free Paper-Piercing Pack!

Happy Stampin'
~Cita

Thursday, October 04, 2012

Simple Thanks


Last month, my wonderful downline, Kim, and I (along with some other Ladybug Stampers) attended the Stampin' Up! regional in Denver, Colorado. We had a blast, and Kim drove us all the way there, and even drove me to the airport after the regional. If you have ever flown into or out of Denver, you will understand that the airport is not close to downtown. :) Kim is awesome. Anyways, she sent this to me after regionals. She was inspired to use a Simply Scrappin' kit to make a card. They are great to make quick and easy cards. And  I loved what Kim did. 

If you would like to join my team of stampers, email me, and I can get you hooked up. The new starter kit is now only $99 and it's fully customizable and comes with over $125 in product. It's a great deal. And then maybe next time you can join us at a Stampin' Up! regional!

Happy Stampin' 
~Cita 

Tuesday, September 18, 2012

Lovely Swaps

I'm going through all my pictures of cards that I have taken this past year (and maybe even further back) and by golly, I'm going to post them all! Be prepared if you are a frequent reader of this blog. Do I even have regular readers? Are you out there? If so leave me a comment.

Anyways, these cards are from a Ladybug Ink swap from sometime within in the last year. I'm thinking they may have been from November of 2011. Yikes! 

~Cita


Sunday, September 16, 2012

Remembering Cupcakes


Once upon a time, I met a Stampin' Up! demonstrator who invited me to her stamp club. After much hesitation, I excitedly joined the club. One of the first projects I ever completed in this stamp club used the now-retired Crazy for Cupcakes stamp set. Guess what I did? I bought that stamp set and never used it again. That's a flat out lie, but it sounded funny in my head, because how many of us have ever fallen in love with a stamp set, bought it, and then let it sit on our craft desk collecting dust for years? Anyways, even though the Crazy for Cupcakes is long gone, I wanted to share this beautiful card with you just in case you still have the Crazy for Cupcakes stamp set sitting somewhere collecting dust.

Stampin Cita' Tips:

  • Color scheme: Pink Pirouette, Chocolate Chip, Whisper White
  • Stamp Sets: Crazy for Cupcakes (retired), Fresh Vintage (Sale-a-Bration 2012)
  • When using framelits, stamp the image first and then place the framelit on top to cut it out. This will allow you to get the perfect position. If your framelit moves, use a sticky note to temporarily attach it to the paper. 
  • To get the oval frame for the Labels Framelits, just cut out two ovals using the small oval punch and adhere them to the back of Labels framelit with the cupcakes. 
  • Use Dazzling Diamonds to color the cupcakes' frosting. I think glitter makes these cupcakes look scrumptious. mmm cupcakes sound good right about now. 
Hope you enjoy this blast from the not so distant past. 
~Cita 

Friday, September 14, 2012

LadyBug Ink Blog Hop: MDS Style

It's Hop time! (I suddenly want to break out in song to "Let's go to the Hop!"). This month, we are focusing on showcasing My Digital Studios (MDS) projects. If you are hopping from Kay's blog, welcome! If you are just joining the adventure, thanks for starting here. You're hopping adventure will take you to six other Ladybug stampers' blogs, where you can marvel at their creativity!

To me, MDS is such a versatile piece of software. I chose to showcase a quick and simple project that Holly Linford showed us at the Stampin' Up! regional in Denver, CO last weekend. This is a simple sour cream treat holder made with regular printer paper printed from my simple at-home printer. I used MDS to create the Halloween looking paper from non-Halloween DSP.

I started with a 11 x 8.5 Landscape canvas in MDS. This is the perfect size because you can prep for four of these treat holders with only one piece of paper. My finished MDS project looked like this.


And then I printed that cutie out. My printer didn't even grumble. Notice the white border around my printer. Most regular printers don't have a bleed option, so you're most likely going to have that border around your printout. Just cut it off.

Next, cut out each rectangle and adhere the sides together so you get a toilet-paper-roll-looking piece of paper. I would recommend using sticky strip to do this (I didn't while prepping for this post because I'm out of sticky strip!


Place adhesive at the bottom of the tubes and pinch it shut. See the sour cream shape starting to form?


Now time to fill with treats! I recommend chocolate!


Finally, adhere the top of the treat and pinch it in the opposite direction of the bottom. And that's it! Four sour cream treat holders from one piece of paper.


Thanks for reading! Now hop on over to Cassie's blog to check out what she has.

~Cita


September Ladybug Ink Hop
Nichole Gonzales Jaramillo http://nicholesu.blogspot.com/
Carmelita Wasson http://carmenacita.blogspot.com/ (you are here)

Friday, August 24, 2012

31% Off Extended to September 14


Good news: Stampin' Up! decided to extend the 31% Off Digital sale until September 14! They said they realized that we were all wrapping up summer stuff, getting everybody back to school, and things are busy. With this extension, everybody can have a little more breathing room to finish their projects to send off to the print services. And don't forget about the 31 digital content items on sale too (listed below).

I love what SU! told us, "Yes, we realize that this change doesn't go along with our little "31 theme," but . . . who cares? When we're talking SALE, 45 days is better than 31!" I love SU!

Contact me for more information on MDS2 or this awesome promotion. August is the month for digital designing!

~Cita 

ItemDigital ContentRetail Price31% Off Price
127217
Floral District Collection Disc $  23.95 $ 16.53
118115
Night and Day Designer Series Paper $    4.95 $   3.42
129929
Candid Frames $    2.95 $   2.04
129921
Check This Out Page Templates $    4.95 $   3.42
129609
Blossom Builders Embellishments $    5.95 $   4.11
128999
It's All Me Kit $    9.95 $   6.87
127441
Whimsical Note Journal Template $    1.95 $   1.35
128342
Pinwheel Daily Calendar Template $    9.95 $   6.87
127599
Party Animal Kit $    9.95 $   6.87
127600
Autumn Traditions Kit $    9.95 $   6.87
127620
Grateful Heart Thanksgiving Ensemble $  14.95 $ 10.32
126027
Playful Polka Dots Kit $    9.95 $   6.87
130066
World Traveler Photobook Template $  17.95 $ 12.39
131221
Storybook Specialty Designer Series Paper $    4.95 $   3.42
130850
Joyful Times Kit $    9.95 $   6.87
124463
One Great Year Digital Kit $    9.95 $   6.87
127175
Limited Edition Embellishments $    2.95 $   2.04
129607
Walk in the Park II Kit $    9.95 $   6.87
129934
#HASHTHIS Stamp Brush Set $    7.95 $   5.49
129923
Book of Birthdays Swatchbook Template $  12.95 $   8.94
121071
Travel Journal Kit $    9.95 $   6.87
129924
Get it Done Kit $    5.95 $   4.11
129005
Sweetly Nested Framable $    4.95 $   3.42
127758
Delight in the Day Photobook Template $  19.95 $ 13.77
130862
Blast Off Ensemble $  19.95 $ 13.77
129890
Little Milestone Birthdays Greeting Card $    7.95 $   5.49
128892
Designer Gift Cards $    4.95 $   3.42
127580
And a Happy New Year Photocard Template $    1.95 $   1.35
127435
Thanks Tons Greeting Card Template Set $    2.95 $   2.04
127587
Sending Glad Tidings Designer Tags Kit $    7.95 $   5.49
127762
Gratitude Framable Designer Template $    1.95 $   1.35

Sunday, August 12, 2012

Catching Up


My daughter is 2 and half years old and I have been working on her scrapbook of her first year for over a year now. With the current 31 days promotion (get 31% off printing services for MDS), I figured I should get my butt in gear and finish her book so I can take advantage of this great offer. Also, the recent release of MDS2 has rejuvenated my love of MDS and I'm loving all the new features and upgrades the new version offers.

In this page, I took advantage of two new features of MDS2. Well, one is not necessarily a new feature, but more of a feature made super easy. First, MDS2 offers a lot more photo layouts. I love using this feature when I'm having designers' block. If anything, the photo layouts are a great starting point, which is what I did on this page. I started off with the big circle picture layout.

The second "new" feature is adding a photo to a punch. Like I mentioned earlier, this feature is not new, it's just SUPER EASY now. All you have to do now it select the "Photo Fill" option in the Design Center pallette, pick your photo, and wa-la the photo fills the punch. Double-click on the photo to tweak the position or even re-size the photo. I used this feature for the three little circle pictures.

Have you had the chance to play with MDS2 yet? If not, take advantage of the FREE 30-day trial. Check out my website for more details.

Happy Stampin'
~Cita

Friday, August 10, 2012

Inaugural Ladybug Blog Hop: Back to School

Greetings! Welcome to my blog! And if you are participating in the Ladybug Blog Hop, thank you for taking part in our inaugural blog hop! We're excited to share with you a little of what us Ladybug Stampers like to do. This month, we are focusing on Back to School.

I have to admit that the Back to School theme was a little bit of a challenge to me since I'm not really involved in school anymore. However, my daughter is two and goes to daycare. Next week, she will be promoted to the next class and I wanted to give her current teachers a little thank you gift. If I remember correctly, teachers appreciate thank you gifts. :)


My gift comprises four parts: the box, pens, a lanyard, and of course, chocolate!


The Big Shot makes making boxes like this so easy! Use the Fancy Favor Bigz XL to cut out the box and decorate it.

I used the Designer Rosette Bigz XL die to make the rosette and the A Fitting Occasion stamp set to put my "Thank You So Much" greeting. Make sure to include lots of chocolate in your box.


I love pens. And recently, I have developed a love to decorate my pens (that way I know when someone steals my pens). I used a strip (1" x 3.5") of Floral District DSP to decorate the inside of this pen.


I actually made this lanyard for the Ladybug Stampers who attended the Stampin' Up! Convention with me, but I also decided that this lanyard would be great to include in my thank you gift. I found a super easy tutorial here, and used the Twitterpated Fabric to make the lanyard.

Thanks for stopping by blog. Next  stop is Miss Cassie.
Come back and visit soon.
~Cita


Thursday, August 02, 2012

My Digital Studio 2 is Now Available


We've known for several months that the new, and awesomely improved, My Digital Studio 2 (MDS2) would be available soon. And now we no longer have to wait! You can download MDS2 RIGHT NOW!!! (Yay!). Head over to my website to order your downloadable version of MDS2 right now and immediately get started on your digital crafting projects.

There are four options for you to choose from. Let me break it down for you.

30-Day FREE MDS2 Trial
If you just want to check out MDS2 before committing to purchasing it, then take advantage of this great deal. For 30 days, you will have access to the full software with a sampling of all the artwork included in MDS2+. You even have the opportunity to purchase print services for the items you create during the trial period.

MDS2 ($39.95)
Get the full software with design tools to create cards, photobooks, calendars, and more. This version includes some functional content including a few punches, card stock, and photo layouts (see it all here). 

MDS2+ ($79.95)
This version comes with the full software PLUS (+) over $500 in digital content.

MDS2 Upgrade ($19.95)
If you already own the original My Digital Studio, this option is for you. This upgrade gives you the full MDS2 software.

If you are confused or have any questions, please do not hesitate to contact me through email or my Facebook page.

Happy Stampin'
~Cita 

Wednesday, August 01, 2012

Hello New Holiday Mini Catalog


It's here!! The new Holiday Mini Catalog is ready for your viewing and purchasing pleasures. It's amazing featuring awesome holiday-themed stamp sets, more framelits, and and amazing paper. You can view the catalog here and then head on over to my website and make your purchase.

When you are done looking through the catalog, let me know what your favorite items are. I'll post my list of favorites in a few days.

Happy Stampin'
~Cita

Tuesday, July 31, 2012

Convention 2012: Stampin' Up! Campus Tour Recap Part 3


I spent a lot more time at the Stampin' Up! campus than I thought I would. It was so intriguing and inspiring. I have to say that my favorite part of the visit was watching the warehouse, where they pick and ship all of our wonderful orders. It was almost mesmerizing watching the boxes travel throughout the warehouse and trying to figure out the inner workings of this amazingly complex operation. (I also had some flash backs from my operations class in grad school. I tried to forget that class). 

This is where it all starts. I wanted to go down there and give them all a hug.
The other side of the warehouse. I loved watching the boxes. Had Miquelita not pushed me along, I may still be there watching.
Here was the first desk we saw going into Demonstrator Support. There were cards displayed all over the place! We even had the privilege to see some of the wonderful supporters in action.
They certainly know how to decorate in Demonstrator Support. I'm getting ideas for my office.


As we were leaving the Demonstrator Support area, one of the ladies who works there was standing by this adorable basket handing out little present to all the demonstrators.
The present was a little fan, and she told us "Because we are your biggest fan!"
And it even says it on the tag attached to the fan. What a great company!


Monday, July 30, 2012

Convention 2012: Stampin' Up! Campus Tour Recap Part 2


Next stop on our self-guided tour of the Stampin' Up! campus was their amazing Ideas Room. No wonder SU! comes up with amazing products and ideas, their Ideas Room is amazing!

What a great place to have a brainstorming session.

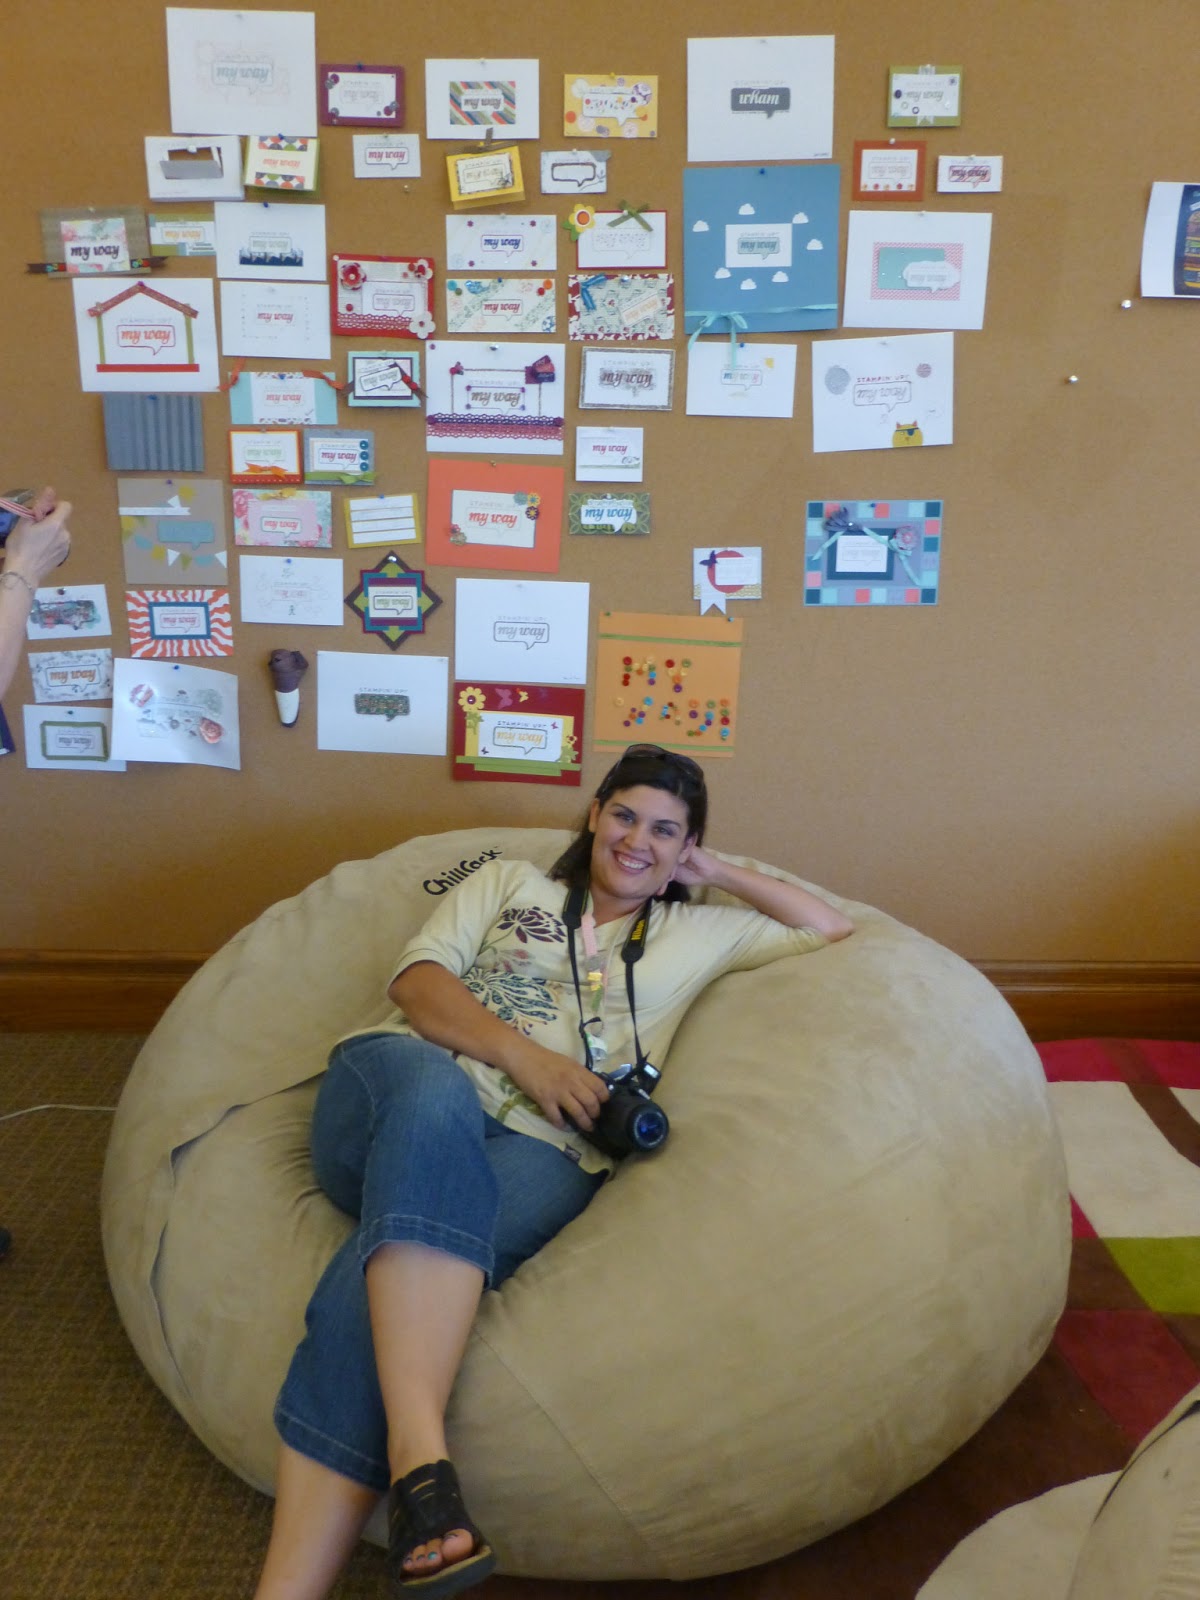
Lots of "My Way" ideas.

Fooseball table?!?!? I would SOOOOO love to work here (and probably kick butt at fooseball. I am the queen of fooseball).

My favorite part was what I'm going to call the White Board Room, which is what it sounds like. An entire room with white boards from floor to ceiling. We left our thanks and signature.
Thanks SU! from the Ladybug Stampers of Albuqueqrue
Fellow Ladybug Stampers, Angela, Vicky, and Miquelita.

Our ladybug among the hundreds of notes on the whiteboard. This was just one wall.
View of the White Board room from the outside.

They had these awesome bean bag chairs of wonder. I wish I had one of these in my office at work (however, I do have one of these things at home).


Snowed In

It's like we were destined to not go to school today. I woke up to a beautiful 6 inches of snow in my yard. We are in the lower elevatio...