Monday, December 19, 2011

Christmas Samples from Regionals (Part 2)

Here are more amazing Christmas-related swaps from the Albuquerque Stampin' Up! regional.

Isn't this beautiful! I love the colors and the embossing.

Yes, this Christmas card does feature the color black.

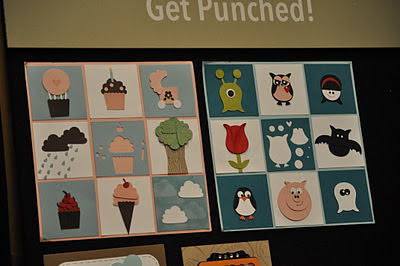
I love punch art, and this person did a great job on the penguin.

Two awesome sets from the Holiday Mini. I love how the punched scallop is also dry embossed.

It's a door! When I first saw this card, I didn't realize it.

Happy Stampin',
~Cita

Sunday, December 11, 2011

Christmas Samples from Regionals (Part 1)

At the Stampin' Up! Albuquerque regional in October, I had the opportunity to swap with some amazing demonstrators from all over the place. I haven't posted many of these swaps, but in the Christmas spirit, I decided to post the Christmas swaps I received. There were some good ones. 

Glitter paper is awesome!

I think this was my favorite Christmas card swap. It's so simple and elegant and the Snowflake Swirled stamp set is dear to my heart.

The ornament stamps along with the ornament punch are great to have.

This card is such an inspiration. I have this set, Pines and Poinsettias, but have been at a loss of what to do with it. This card has changed that mentality.
Isn't this a fun card? This card makes me want to go play in the little pile of snow in my front yard. 


~Cita

Tuesday, November 29, 2011

Warm Wishes on an Oversized Card


Last month, I said goodbye to my beloved supervisor at my day job. She moved on to another project in the company, and consequently moved to a new location. On her last day, we had a nice send-off lunch and off course I had to make her a card. She knows I'm a stamper, so I just HAD to make one. I also wanted to get as many people to sign her card as I could, so I made it bigger than the 5.5" x 4.25" card. The above card was the result. It opens up and provided lots of space to have dozens of people sign their wishes. She loved the card. Mission accomplishment. 

Stampin' Cita Tips:
  • Stamp Set: Warmest of Wishes (Holiday Mini Hostess Set)
  • Color Scheme: Pool Party, More Mustard, Chocolate Chip
  • Accessories:  Spice Cake DSP, Wild Wasabi embossing powder, Top Note die, Peekaboo Frames Bigz L die
  • Cut two top notes from the Top Note die - one from More Mustard Cardstock and one from the Spice Cake DSP. Take the DSP Top Note and cut along the dotted lines; adhere it to the More Mustard Top Note. 
  • Emboss the "Warmest Wishes" sentiment on Very Vanilla. Cut the Top Note-looking image from the Peekaboo Frames die in More Mustard. Make sure to not open the frame. Adhere the embossed image to the peekaboo frame. 
  • Cut two 11"x5" pieces of Pool Party Cardstock. In landscape orientations, score each piece at 3-1/2". Fold the ends up and place one of the pieces on top of the other. Adhere (I used sticky strip to make sure it was more secure).
 

This was a fun card to make, and I think I may use this concept in the future when others on my team leave. I think this design is easy to switch out the colors and DSP and still have a quick card. 

Happy Stampin'
~Cita

Sunday, November 06, 2011

Random Thoughts: Doing What I Love


So, I'm going to get a little mushy here.

A few weeks ago, the world said goodbye to Steve Jobs. Thanks to him, I have my beloved iPod with who knows how many awesome apps. He was truly an amazing man in how he led Apple to push technology and revolutionize so many technological areas. I thank him for that.

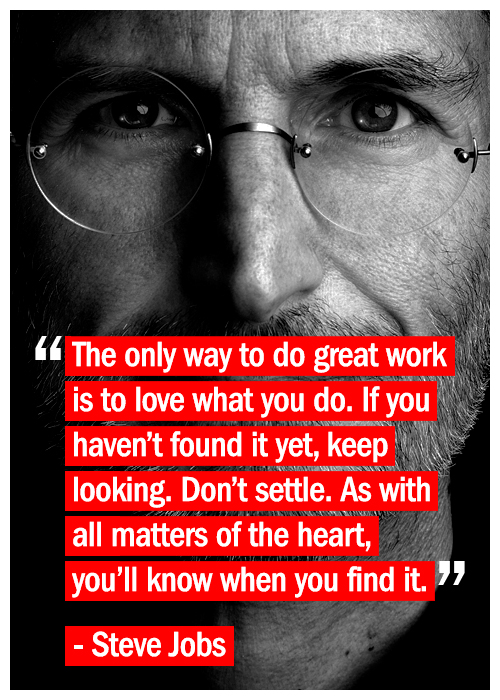
A few years ago, during my short-lived attempt at graduate school, a professor assigned my class to read Steve Jobs' 2005 Standford Commencement address. This was one of my favorite assignments ever. His speech is amazing. I remember being inspired by that text, but this particular paragraph stood out then, and it still stands out now.

Sometimes life hits you in the head with a brick. Don't lose faith. I'm convinced that the only thing that kept me going was that I loved what I did. You've got to find what you love. And that is as true for your work as it is for your lovers. Your work is going to fill a large part of your life, and the only way to be truly satisfied is to do what you believe is great work. And the only way to do great work is to love what you do. If you haven't found it yet, keep looking. Don't settle. As with all matters of the heart, you'll know when you find it. And, like any great relationship, it just gets better and better as the years roll on. So keep looking until you find it. Don't settle.

I think Shelli and Steve Jobs could have been great friends. :)

This paragraph reminds me a lot of Stampin' Up! How I, as a demonstrator, love what I do. I LOVE to stamp. And I love how SU! gives me such a great opportunity to share what I love and do what I share. Furthermore, I love my day job. I'm a technical writer for a science and engineering company, and I love it.


Are you still looking for something to love? Seriously, try stamping. And if you are already in love with Stampin, try Stampin' Up! Become a demonstrator and learn why thousands of women and a handful of men proudly proclaim that they love what they do. You can still keep your "day job." (I did.) Contact me if you want to talk more about the opportunity.

Happy Stampin'
~Cita


Tuesday, November 01, 2011

It's a Good Time to be a Hosttess


Today, Stampin' Up! announced an awesome promotion. From now until December 15, you can earn extra hostess dollars with a minimum workshop of $350. Here's the details.
  • Dates: November 1, 2011 - December 15, 2011
  • Hostesses will receive an additional $35 in free Stampin' Up! products when they hold a workshop totaling $350 or more (excluding tax and shipping)! This is in addition to all the other benefits they already get as a Stampin' Up! hostess.
Hostess' workshop sales total is
Your hostess earns hostess dollars

It's Good to Be the Hostess
Total Free Stampin' Up! Merchandise
Plus, hostesses earn full-priced items at 50% off
$350
$50
+
$35
$85
---
$400
$65
+
$35
$100
1 item
$500
$80
+
$35
$115
2 items
$750
$120
+
$35
$155
3 items
$1,000+
$160 plus 15% of amount over $1,000
+
$35
$195 plus 15% of amount over $1,000
4 items

Contact me to discuss how you can take advantage of this awesome promotion!

Happy Stampin',
~Cita

Wednesday, October 26, 2011

Albuquerque Regional Samples

This past weekend, Stampin' Up! visited Albuquerque and held a half-day regional. In true Stampin' Up! style, there was a set of sample boards set up for our viewing pleasures. Here are some of my favorites.
Punch Art Examples.

Beautiful Halloween Card using the shaker frames.

Punch art on a gift bag.

Christmas card made from a Simply Sent kit.

Cute reindeer made from the stocking punch.

Love the glitter paper on the stockings.

More awesome glitter paper.

Beautiful card using masking technique. 
Fun, huh? All these Christmas-related samples are a huge reminder that Christmas is around the corner. I have already started making my cards. How about you? Are you prepping for Christmas yet?

Happy Stampin'
~Cita

Saturday, October 22, 2011

Albuquerque Stampin' Up Regional

Stampin' Up! visited Albuquerque today!

Today, was the Albuquerque Half Day Regional, and it was amazing! Fun, stamping, swaps, free stuff.....I couldn't have had a better Saturday. Here's a few highlights from today's regional.


I wish you could see how sparkly this card was in real life. This card makes me want to actually design a Halloween card.

Carrie Cudney showed us this cute Christmas tag you can make.

This is a cute little coupon book Carrie showed us. We all got a packet with all the supplies and instructions to make this.

This card was designed by one of Stampin' Up!'s IT guys. :) They had a challenge to design a card using items from their desk.

I love this card!

Card using items from a Simply Sent kit.

Punch art card.

Decorated card holder. We all got the card holder (just not decorated).

We learned how to make this sparkly border using just the Scallop Border punch.

Fellow Ladybug stamper, Ruth, being prize patrol.

Another Albuquerque demonstrator showed us how to make a telescoping card.

Fellow Ladybug demonstrator, Ruth, takes the stage to show us a Workshop Wow.

Ruth demoing on stage.

Ruth showing off her cute card. She got a lot of "oooo" and "ah"s

Bonnie Thurber thanking Ruth.
Stampin' Up! Regionals are held in select cities across the nation. (Albuquerque was very fortunate to have been selected this year!) They are first open to only demonstrators, but after a few days, and if there is space available, SU! will open up the regional to non-demonstrators. The Albuquerque regional was full in less than two days, so it was definitely worth being a demonstrator. Hopefully you can attend a Stampin' Up! regional one day.

Happy Stampin',
~Cita 


Sunday, October 16, 2011

Buy Two Simply Sent Kits-Get a Free Stamp

October has been a great month for Stampin' Up! promotions.

Until October 31, if you buy any two Simple Sent Kits you get a FREE coordinating stamp set. The card kits offer a variety of basic themes, so it's easy to create cards for any occasion. These kits are great for those of you who want to dabble in stamping but are unsure to take the plunge or those of you who need a quick way to make handmade cards.

Details:
  • Promotion is good until October 31, 2011. 
  • Simply Sent kits ordered as part of a hostess's free benefits do not qualify for the promotion.
  • There is no limit to the number of times a customer may participate.  
Simply Sent Kits (Buy any two)
  • Simply Sent Great Day, 122375, $12.95
  • Simply Sent Everyday Elegance, 122377, $11.95
  • Simply Sent Sweet Moments, 122376, $13.95
 Free Coordinating Stamp Set
  • It's Your Day, 123682
  • Es tu día (Spanish It's Your day), 124685
  • C'est ta fete (French It's Your Day), 124800
  • Everyday Wishes, 123686
  • You're Cherished, 123684
  • Chérissons les anges (French You're Cherished), 124865
Head over to my website to order you two Simple Sent Kits and get your free coordinating stamp.

Happy Stampin',
~Cita 


Wednesday, October 12, 2011

The Energizer Card


Where's the Energizer Bunny? Watch closely and you will see that cute little thing bang his drum across the picture of this card. Not really, but sometimes I feel that this card is the Energizer card, it just keeps going and going and going. Or actually, I keep making it and making it and making it. It started off as a swap. And then it was my Stamp Camp card. And then it was my convention swap, and now I think I'm going to use it for my regional swap because I have some left over from convention. 

Stampin' Cita Tips:
  • Stamps Sets: Delicate Doilies, Teeny Tiny Wishes
  • Color Scheme: Concord Crush, Melon Mambo, Wisteria Wonder, So Saffron, Pretty in Pink, Whisper White
  • Accessories: Filigree designer brads, 5/8” Pretty In Pink Satin Ribbon, Ticket Punch, Beautiful Butterflies Stampin' Up! Bigz Die, Flirtatious Specialty DSP
  • Stamp the images from the Delicate Doilies on Whisper White using Melon Mambo for the biggest doily, Wisteria Wonder for the middle-sized doily, and So Saffron for the small doily.  
  • Use the ticket punch to punch the corners of the Melon Mambo and Whisper White cardstock. Layer the Whisper White on top of the Melon Mambo.  
  • Wrap some Pretty in Pink Satin Ribbon around a piece of Wisteria Wonder cardstock. Stamp a greeting from the Teeny Tiny Wishes stamp set under the ribbon and then adhere your Flirtacious DSP butterfly to the ribbon. Another idea is to stamp the greeting on the ribbon, but I don't think it looks as good doing this. You can decide for yourself.   
The Albuquerque Stampin' Up! regional is in a week and a half. I'm hoping to get more swaps done, but I'm just super excited about the regional. I love Stampin' Up!


Happy Stampin', 
~Cita
 

Sunday, October 09, 2011

Get a Free Big Shot!!!


Yes, you read that correctly. :)

Join Stampin' Up! as a demonstrator during the month of October and you will get a FREE BIG SHOT  (or up to $100 in free Stampin' Up! products) in addition to all the great stuff you get in the starter kit.Think of it this way, you're getting over $400 of product for only $175. That's a deal. Contact me for more information or to sign up.

Happy Stampin'!


~Cita

Thursday, September 29, 2011

Who Who Who is Having a Birthday?


I'm once again reminiscing about the 2011 Sale-a-Bration stamp sets. I loved loved loved the sets this past year, and I refuse to get rid of some of them. Such as the SAB Punch Bunch set. Nope. Never. I'm not getting rid of it. And one of the reasons is the owl image. It's so STINKIN Cute. And then you can easily punch him (or her) out with the Owl Punch, use some DSP to dress him up, and then adhere him to almost any type of card. In this case, Mr. Owl went to a birthday party at my spring stamp-a-stack. 

Stampin' Cita Tips:
  • Stamp Sets: SAB 2011 Punch Bunch, Party Hearty (retired)
  • Color scheme: Pacific Point, Baja Breeze, Real Red, Very Vanilla, Chocolate Chip 
  • Accessories: Owl Punch, Scallop Square Duo Bigz Die, Perfect Polka Dots Textured Impressions Embossing Folder Die, Silver Brads, Modern Label punch.
  • Use the Scallop Square Duo Bigz Die to cut out the bigger scalloped square. Then, use the Perfect Polka Dot Textured Impressions Embossing folder to emboss the polka dots on the scalloped square. 
  • Stamp the owl image three times in Chocolate Chip. Use the Owl Punch to punch out each owl. Take a piece of scrap DSP and punch out a "body" from the Owl Punch. Adhere that to one of the owls. On that same "dressed up" owl, use Stampin' Write markers to color its eyes and beak. 
  • Use Stampin' Write markers to color one of the birthday hats on the Party Hearty stamp set birthday hats stamp. Remember to "huff" on it before stamping the image to make sure the ink isn't completely dry. Cut out the birthday hat with some Snips and adhere it to the head of the "dressed up" owl. 
  • Stamp the "Pearty Hearty" greeting in Real Red on Whisper White and punch out the greeting using the Modern Label punch. Use a paper piercer to pierce two holes in each side of the modern label and insert silver brads. Attach using dimensionals.   
Overall, this is a simple card, but if you want to mass produce this card, stamper beware. The polka dot scallop can take some time since you can only run one scallop square in the embossing folder at a time. 

Happy Stampin'!
~Cita   

    Tuesday, September 27, 2011

    Punch Out Birthday


    Here's another card from the 2011 Sale-a-Bration timeframe. I love how the Punch Bunch stamp set would help to make simple cards, such as this birthday card. Three stamps, punch, DSP, and a little ribbon, and wa-la a cute, simple birthday card that could be used for a boy or girl.

    Stampin Cita Tips:
    • Stamp Sets: 2011 SAB Punch Bunch 
    • Color Scheme: Real Red, Pacific Point
    • Accessories: Brights Patterns DSP, Real Red 1/8" Taffeta Ribbon, Scallop Square Punch 
    • Stamp the "happy birthday" image three times in Real Red and then once in Pacific Point. Punch out the three Real Red images with the Scallop Square punch and then cut out the middle square of the Pacific Point image. Adhere the Pacific Point square to one of the Real Red images. 
    • Adhere your piece of DSP to the Pacific Point card base. Adhere two pieces of Real Red 1/8" Tafetta Ribbon to the DSP parallel to each other.
    Super easy, huh?

    Happy Stampin'
    ~Cita

      Thursday, September 22, 2011

      Stampin' Up! on Top Ten List!


      When you buy stamps from Stampin’ Up! you are buying the best. And here’s proof!

      Creating Keepsakes magazine recently named Stampin’ Up!’s wood- and clear-mount rubber stamps as one of its Top 10 Tools for 2011.

      And now, a personal testimony:
      I’m a bargain hunter. My loyalty to brands is few and far between, but I am loyal to a few of them – Stampin Up! being one of them. But I didn’t fall in love with Stampin’ Up! overnight. It took me several months to realize just how awesome Stampin’ Up! products are. Their quality can’t be beat, and the prices really are not that bad. Having tried numerous other stamp brands, ink brands, and cardstock brands, Stampin’ Up! is truly the best. Thus, one of the reasons why I decided to sign up as a demonstrator and get 20% off my personal orders. 

      I love Stampin’ Up!

      Happy Stampin’
      ~Cita

      Tuesday, September 13, 2011

      Variation of a Mother's Day Card

      When I have classes they are generally small. At first, wanting to be a successful demonstrator, I was a little discouraged on my average class size (which is three people). However, in the past two years, I have learned to love my small classes. Not only am I able to share what I love, but each attendee usually gets a lot of attention, something they may not get if I had a huge class. I have also learned that by having small classes I am able to unleash my attendees' creativity. They learn to use my card designs as a starting base and customize it according to their preferences, materials available, and needs.

      In April, I had an Occasions Card Class, where we made three cards for upcoming holidays (Mother's Day, Father's Day, and Graduations). One of the ladies mentioned that she didn't need a Mother's Day Card, but she needed a Sympathy Card. So I pulled out a greeting stamp that could be used for a Sympathy card and opened a door of creativity for all three of my attendees. It was so much fun. I thought I'd share what we created that evening.

      This is my original design. This color scheme (Pumpkin Pie, Pink Pirouette, Baja Breeze, and Old Olive) is out of my comfort zone, but I think it worked.

      This is Donna's card. She didn't need a Mother's Day card, so we used "Thinking of You" and then embossed it with white embossing powder. I love how this came out and how the embossing makes the sentiment pop from the card.

      This inspired Sylvia to go all out. She wanted a Mother's Day card, but she didn't want her sentiment on the DSP, so she moved it. After rummaging through some of my ribbon scraps she found some scrap Soft Suede ribbon that she bunched up.

      Phoebe had a blast playing with her card. Having never embossed, she took to it quickly and fell in love with it. She added a little tilt to her embossed sentiment.

      I may be a little biased, but my classes are fun. We have a great time stamping and unleashing creativity. If you are in the Albuquerque area and would like to attend a class, please contact me. A list of my upcoming classes can be found on my Stampin' Up! website.

      Happy Stampin'
      ~Cita

      Snowed In

      It's like we were destined to not go to school today. I woke up to a beautiful 6 inches of snow in my yard. We are in the lower elevatio...