Thursday, July 17, 2014

Inspire Create Share 2014: Day 1

Inspire. Create. Share. 2014: Day 1

Phew. What a day! The official first full day of Inspire Create Share started (for me) at 545 am. Yes, that early. But only because I wanted to run in beautiful downtown SLC, and my roomie was so gracious to join me.
And then of course I wanted to get to the Salt Palace early to start swapping and stand in the (very long) line for General Session. 

General Session started a little differently this year. Usually, Stampin’ Up! employees cheer us as we enter the Main Stage area, but this year they were absent.  While waiting for General Session to start, I wandered around, swapping and making my way to the very front of the room to get a closer look at this year’s beautiful stage. 


Finally, with heightened anticipation, General Session started and I soon learned where all the Stampin’ Up! employes were hiding - they were back stage. For the opening, they went through the Statement of the Heart while introducing each department in between sentences. Global Operations, Human Resources, Demonstrator Resources, Training (I can’t remember all the official names of each department) - each department made their way on stage and we applauded them. For so many years, they have applauded us demonstrators as we started convention, and even though I missed that grand entrance, I felt excited to cheer for each Stampin’ Up! employee. I appreciate these people. They provide so much for me as a demonstrator and sometimes I take them for granted.  

Oh, and as each department exited the stage a few fireworks went off. I don’t remember pyrotechnics ever being present during convention, but it was a fun touch and added to hype of the opening. 

Finally, Shelli Gardner, Cofounder and CEO of Stampin’ Up!, rotated her way on stage and was beautiful as ever. I want to look like her when I’m heard age. 

As we were sitting down, we were surprised by a sneaky all-attendee giveaway. They didn’t announce it like they usually do, but rather just started handing out stamps. (It was a dream come true!) We each got one of six individual stamps. 


Shelli gave a great talk, encouraging us to Inspire Create and Share with all people around us. She included a story about a recent adventure she had while talking to strangers about stamping and hosting workshops. 

After Shelli, Ms. Pam Morgan took the stage and made me all giddy with excitement as she introduced us to the new Holiday Catalog, highlighting some of the new products, stamps, and ideas. Many people know that I get a little grumpy with new catalogs because I can get so overwhelmed, but I’m pretty excited about this catalog. 

Per Stampin’ Up! policy, I can not post pictures of the actual product, but I can post pictures of projects using the new products. I’m going to be an obedient demonstrator and just post projects. But you’ll get to see the cuteness and versatility of all the great products. Can you say box punch board? Snowflake embellishments? And lots and lots of framelits! 

Toward the end of General Session the amazing Becky Higgins joined Shelli onstage to talk more about Project Life and tell us more about herself. Have I mentioned that I love Project Life and I am so excited that we now offer Project Life by Stampin’ Up! It was great to hear from Becky and welcome her to the Stampin’ Up! family. 


The rest of the day I wandered through classes and the gathering place, where I took lots of pictures of the samples and product boards and even resubscribed to Paper Pumpkin. They allowed us to peek at the upcoming Paper Pumpkin kits and they are so great I just had to have them. We couldn’t take pictures. There was even a guard there. I didn’t want to lose my camera or my phone. 

Here are some more highlights from my day.  


One of my favorite places at convention is the Product Playground. If there is an item I am on the fence about purchasing, the product playground usually where I make my final decision. I didn't make it to the playground today because I got stuck at the display boards.


Hello!!! It's Elsa's dress. I think this has made it's rounds on Pinterest but it looks so beautiful in person. It took everything in me to not cross the barrier and steal it. (This is a joke, I don't steal from display boards.)


I love how they are doing Make & Takes this year. We sat through a workshop given by a fellow demonstrator and then made these two beautiful cards.

 Those are my swap in a cute Thirty-One Littles Carry-All, one of the my favorite Thirty-one product. Confession: I am also a Thirty-One consultant, but Stampin' Up! is my first love. This thing is great for holding swaps.

 Dinner with my random roomies. I came to convention alone because all the other Ladybug stampers had more important things to do than come to convention this year. So, I took a risk and met these ladies online who were looking for a fourth roommate. I have to say that these ladies are amazing and I'm so excited and blessed to be rooming and hanging with them. One of the MANY perks of being a Stampin' Up! demonstrator is meeting amazing ladies who all share the same passion for stamping and paper crafting.

 I didn't win this morning, but I still enjoy the heightened rush of anticipation as you wait for the presenter to call out the winning color. Send good thoughts to Crisp Cantaloupe.

 I loved this display of the new 2014-2016 In Colors. I wonder if my husband will allow me to CASE this display on our living room wall.

 I don't know how long I stood and admired this beautiful flower.

 Here's a little sneak peek of some of the upcoming Holiday Catalog products. I am really looking forward to this paper. A little secret, it's a one-sided DSP, but it's beautiful.

 Another sneak peak. There's going to be a tree set with a coordinating punch. It's going to be produce lots of cute Christmas cards this year, I just know it.

 During the workshop, the demonstrator demoed these cute, but super simple Thank You cards. I may be CASEing these in the near future.


Although running out of steam at the end of the day, I still found myself at the MDS Unplugged class taught by Holly Linford. She showed us how to make some of the beautiful decorative items featured in the Annual Catalog using MDS. She encouraged us to not be afraid of using the MDS digital downloads. I'm anxious to get home and use my e-cutter with some MDS downloads. 

I'm excited for tomorrow. Another general session. Another set of Make-and-Takes. Several more classes. More time in the Gathering Place. And I'm ready to party at the Awards After Party. Remember to follow me on Twitter, Facebook, and Instagram for more real-time updates. 

Happy Stampin' (and good night), 
~Cita

P.S. I really need to go to bed, so I'm posting this without thoroughly proofing my text. Future employers, please disregard this post. I usually proof my posts. 

Wednesday, July 16, 2014

Inspire Create Share 2014: Day .5


I'm in Salt Lake City!

I'm here at Inspire Create Share 2014. 

After a delayed flight, a sprint across McCarran International Airport, and dealing with motion sickness on the flight to SLC, I made it to my beautiful room across the street from the Salt Palace Convention Center. 

Festivities started tonight at around 6 pm (I was late...thank you delayed flight) with the Check-In/Bag Pick-Up and then My Paper Pumpkin Night. I got to make a super cute Make-and-Take, have cake for pre-dinner (I hadn't had a real meal all day), and finally meet my roomies. Here's some highlights from tonight. 


I was notified that my flight was delayed before I left the house, so I took the opportunity and extra time to have a tea party with my daughter . We invited Bunny and Zelda the kitty. 

 I had a connection in Las Vegas. I said hello to the strip from the airplane and then sprinted to the other side of the airport to catch my flight.

 And on the flight I got to see the Hoover Dam. Yippee. 

Ok, so enough about my long trip. Let's talk about convention. 

Tonight was a My Paper Pumpkin Open House. There were all sorts of great facts about My Paper Pumpkin, an opportunity to sign up and receive a free gift, drawings, treats, and a Make-and-Take. 

 I kind of got that convention giddiness walking into the party. Music was thumping and the smiles were contagious.
 This was my dinner (not really, but I did indulge in some yummy carrot cake)

Here is the My Paper Pumpkin M&T, which is also a sneak peek at the September My Paper Pumpkin kit. This was super easy to make and the rest of the kit was super cute. I'm going to renew my subscription just so I can get this kit in September. It will make Halloween treats super easy. 

I took a break from the My Paper Pumpkin party to actually check-in and receive my convention goodies. As always, the convention bag is one of the many things I look forward to, and this year it does not disappoint. 

And while I was waiting in line, I met this great lady from Nashville who gave me my first swap, but it was an unfair swap because I didn't have my swaps on hand to properly swap with her, but she gave it to me anyway. Totally made my day because it is a cute swap. 


My roomies and I also exchanged gifts tonight, but I'll have to post those later because it's time to get rested up for all the great festivities tomorrow.

Remember to follow me on Facebook, Twitter, and Instagram for the latest updates throughout the day. 

Happy Stampin' , 

~Cita 

Follow Me at Inspire Create Share 2014


There’s a party going on in Salt Lake City the next few days, and I’m anxiously sitting in the Sunport waiting for my delayed flight to arrive so I can join the excitement at Inspire Create Share 2014. Join me the next few days as I share with you all the sights, news, and excitement from this year’s Stampin’ Up! Convention. I’ll be posting at least once a day, but will be providing more real-time updates on Twitter, Instagram, and Facebook. Follow me on all three networks and enjoy!

Twitter: @stampincita

Instagram: carmelitacita

Facebook: www.facebook.com/stampincita


Looking forward to sharing with you the next few days. 

~Cita  

Thursday, July 10, 2014

Throwback Thursday: Going on a Petal Parade


Here's a throwback to Sale-a-Bration 2014 using the Petal Parade stamp set. I loved how easy it was to mask the flowers and the petals, and the color combination of Coastal Cabana, Old Olive, and Cameo Coral was a hit in my book. This is not a color combination I use often. 

Happy Stampin' 
~Cita 

Tuesday, July 08, 2014

Christmas in July


July seems to be the month where Christmas creeps up on crafters. And with Stampin' Up!, it's not any different. (Hey, us crafters have to have adequate time to create all the Christmas goodness for the holiday season.)

Today, the Seasons of Beauty stamp set is available for your purchasing joy. This stamp set is a little sneak peek from the upcoming 2014 Holiday Catalog. Head on over to my website to purchase this adorable stamp set.


Happy Stampin'
~Cita

Thursday, July 03, 2014

Throwback Thursday: Love Simple Cards


Sometimes I create cards faster than I can post them on my blog. I thought that once I stayed home and no longer had my day job, I would have more time to blog, but this is not the case. I'm amazed at how much more busy I feel these days staying home with my daughter. The other day I told my husband that I felt like I had more free time when I was working than I do now. This isn't a complaint, just one of the many misperceptions I had when I was working and envisioning my life as a stay-at-home mom. Bottom line: I love staying home with the booger. I do miss work, but I don't miss GOING to work.

Anyways, here's a card made with some now-retired product in honor of Throwback Thursday. I CASEd it from a card featured in Stampin' Success, the awesome bi-monthly magazine I get from Stampin' Up for being a demonstrator. Getting this magazine is one of the many perks of being a demonstrator.  Visit my website to learn more.

Happy Stampin'
~Cita

Tuesday, July 01, 2014

Get all the DSP!!! (but 3 get one free)


Who wants DSP?

I do! I do!

Happy July! This month, when you buy three packages of DSP, you get one package for free! This is a great way to stock up on all that beautiful DSP.

Here's the details:

  • There is no limit to the number of free DSP pack you can receive. For each three purchase, you will receive one free!
  • To get your free DSP when ordering from my website, enter it in your order separately from the three packs you're paying for. For example, if you want four packs of the same type of paper, put in three you're paying for and the fourth as a separate item. 
  • These items don't qualify for the special:
    • DSP Stacks
    • Specialty DSP
    • DSP paper ordered through your hostess benefits (contact me to learn how to get hostess benefits)
  • Sale ends July 31!


Monday, June 30, 2014

Where did June Go?

It's June 30th, people.

WHAT?!?

Where did the month go?

At the beginning of the month, I felt like summer had snuck up on me, and now, here we are at the end of the month, almost half way through the summer vacation months. I'm loving it. I'm also super busy. It's amazing how a 30-minute swim lesson can derail a day or how long it takes to recover from a weekend getaway. I'm not complaining, just being real.

I have been crafting lately. In fact, a couple of weeks ago I attended one of the Ladybug stamper's scrapbook weekend. 48 hours of scrapbooking/crafting bliss. (I did have to sleep, take breaks for the restroom, and spend a few minutes with the family when they came to swim). I'm hoping to post more about that weekend in the upcoming days, but don't count on it. Instead, check out  my friend Ruth's blog for her weekend recap of Camp Crop-a-Lot.

And if you are still reading and interested, here are some of the things I did in June instead of blogging.

1) Took this little booger to swim lesson everyday for two weeks.


2) Went scuba diving in Santa Rosa, NM (yes, you can dive in New Mexico!)


3) Attended the Albuquerque Folk Festival where we listened to some amazing music, played instruments, and learned a little bit of Irish Step Dancing.


4) Went to the library for the Summer Reading Program events and to put on puppet shows.

5) Went hiking with friends.

6) Visited Grandpa in the Four Corners area. 


7) Visited the splash park.


8) Played lots and lots and lots of Legos.


 9)Visited the National Museum of Nuclear Science and History.


10) Baked.....and did science experiments....and got incredibly messy.


So there you have it folks - my excuse for not blogging (for not even posting about the new 2014-2015 Annual Catalog) during the entire month of June.

I do post on my Facebook and Twitter pages a lot more. So make sure to follow me for the latest updates. 

 I hope your summer has been just as adventurous and fun as mine. Here's to July!! 

Happy Stampin' 
~Cita 

Friday, May 30, 2014

Made in the USA


Do you believe in Photopolymer Stamps?

At first I didn't. But then Stampin' Up! released the Map it Out Photopolymer Stamp Set and I had to have it. I was sold by the United States stamp alone. So, I took the plunge and I bought the photopolymer stamp set.


Stamping and dealing with photopolymer is different. It's not bad, just different than rubber stamps. They stick very well to the clear blocks and are great for perfect alignment. However, I felt like I had to practice a bit when it came to inking and stamping with the stamp. For this card, I used Staz On black ink because it seemed like the regular Basic Black ink wasn't stamping dark enough with this particular stamp. My photopolymer experiences is limited, so I'm sure there are all sorts of techniques out there for stamping with photopolymer. I need to get used to it, because Photopolymer is here to stay and there's going to be some amazing photopolymer stamp sets in the near future.

Stampin' Tips:

  • Color Scheme: Bermuda Bay, Strawberry Slush, Whisper White, Summer Starfruit
  • Stamp Set: Map it Out Photopolymer Stamp Set, Express Yourself Hostess Set
  • Accessories: In-Color DSP, Kaleidoscope DSP, SAB Summer Starfruit Baker's Twine, Angled Tag Topper Punch, 1" Circle Punch
  • Use the Angled Tag Topper Punch to make a 2"x4" piece of Whisper White Cardstock into a tag. Stamp the United States image using Staz On ink onto the tag. Punch out a 1" circle and adhere over the hole of the tag topper and punch a hole through the circle to thread the baker's twine through. 
  • Use the heart stamp to place a heart in whichever state your heart lies in. My heart belongs to New Mexico. 


What are your thoughts on Photopolymer stamps? I would love to hear your experience using these new stamps.

Happy Stampin'
~Cita

Wednesday, May 28, 2014

Anniversary Moon


When you get married, you get to go on a honeymoon. And lately, when people are expecting, they like to go on a baby moon, the last hoorah trip before baby comes and takes over their lives. Each year, around our anniversary, my husband and I go on a trip. This year I decided to call this trip our anniversary moon.

Each year, we tend to travel north - Taos, Trinidad, Abiquiu, Jemez Mountains - these are all past destinations for our anniversary moon. This year, we decided to go south to the stomping grounds of my youth, Ruidoso and the surrounding Sacramento Mountains. I grew up in this area and I'm appalled at all the amazing, beautiful things I missed while living there. The Sacramento Mountains are full of beautiful landscapes and hidden springs. I can say the same thing for Ruidoso, although I feel like I had a chance to experience Ruidoso a lot more than the very mountains in my backyard.

I wanted to share some of the highlights from our trip, which was full of adventure and relaxing. If you ever visit this part of New Mexico, I highly recommend visiting these places and experiencing their beauty and fun for yourself. And then, you can use My Digital Studio to document your experience as well. :-)

Bluff Springs
Bluff Springs is nestled deep in the Sacramento Mountains, but easily accessible. There's a stretch of a few miles where you have to drive on dirt road to get to this area, but it's a nice dirt road and won't hurt your car. The entire area is a recreation area and people like to go out there to camp. We like to go and visit the little spring and admire the accompanying waterfall.  This time, my husband was determined to collect water from the spring to drink later (after boiling it of course). I enjoy walking along the little stream that the spring creates and watching the little waterfall as the stream falls over the bluff. You can walk right up to the waterfall.

I love using pictures in a the background for my MDS projects. 
Bonito Trail No. 36
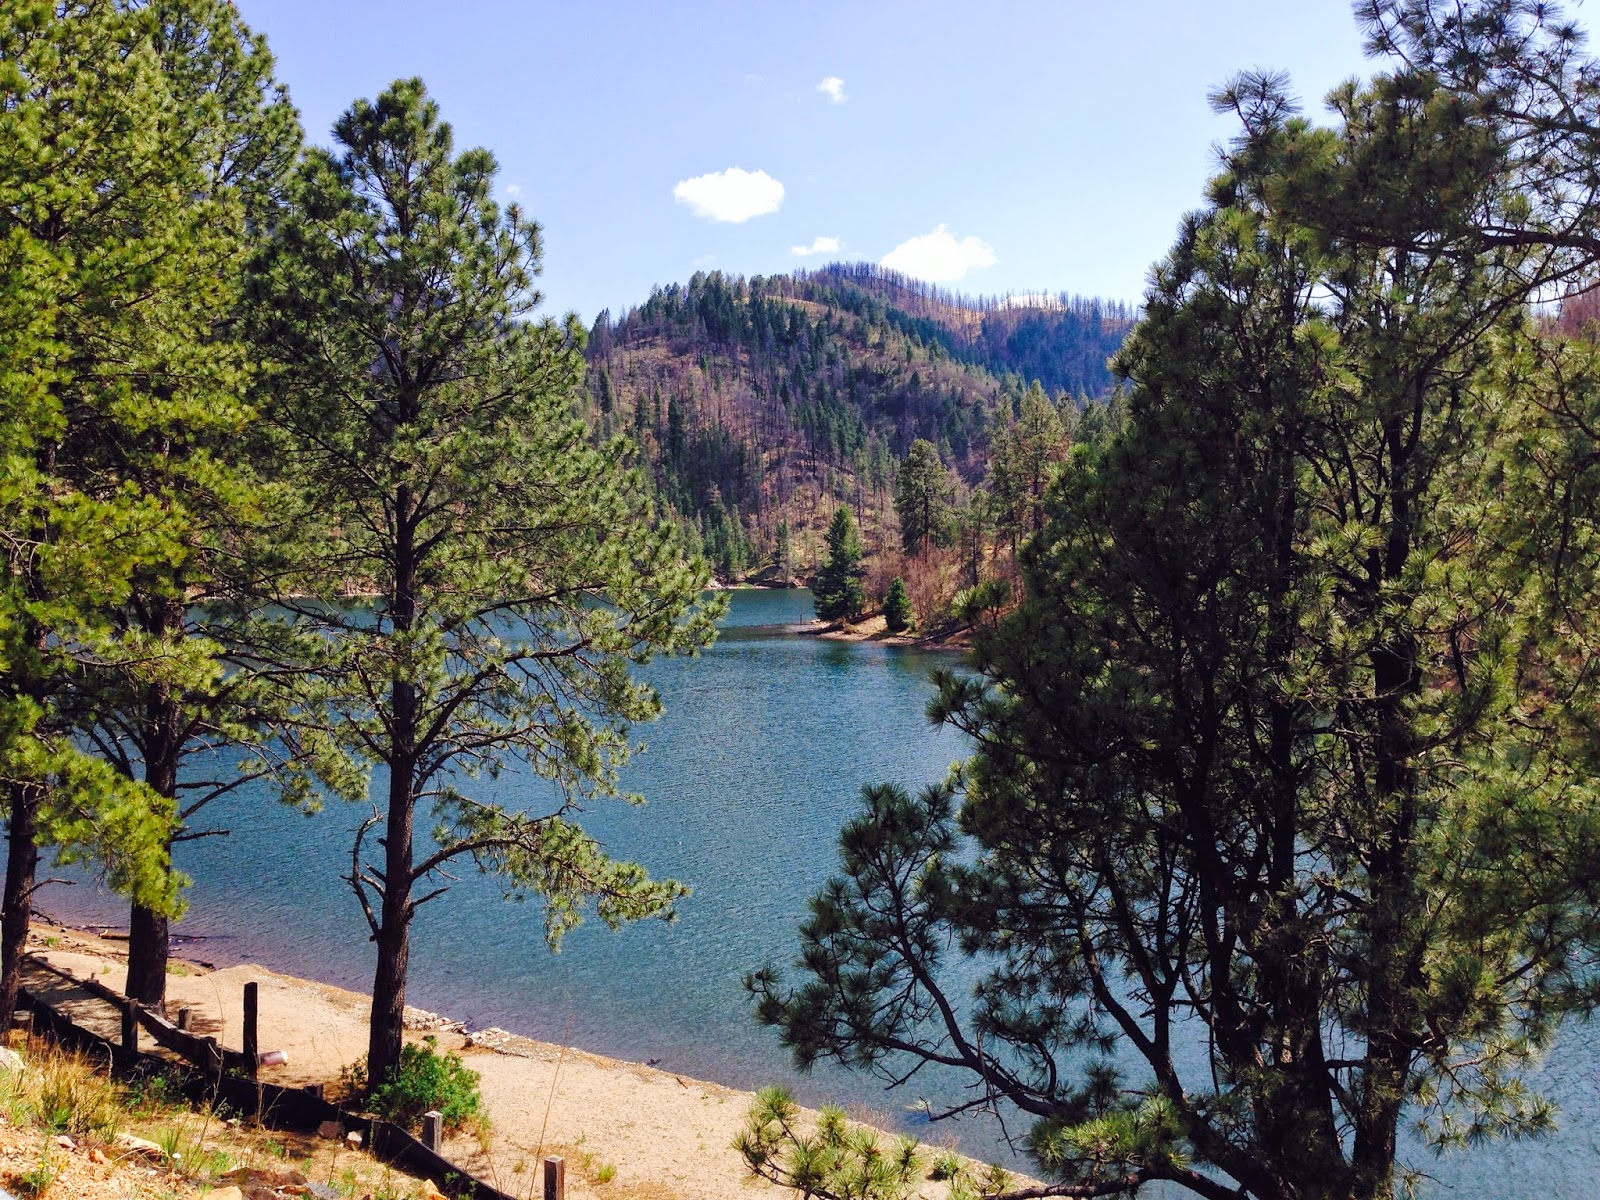
As a kid, my family made many trips to the Bonito Lake area, but I never hiked along any of the trails. As we passed by Bonito Lake, I was surprised to see it pretty much shut down to the public. I felt like you can look, but you couldn't touch in any way. Turns out that the Little Bear fire in 2012 contaiminated the lake and the City of Alamogordo has shut it down. The city can't even use it for drinking water as it has for many years because of all the silt and debris form the fire. Needless to say, the lake still looks beautiful, and despite the burn scars that plague this area, the area is still beautiful.

Bonito Lake. Look, but don't touch.
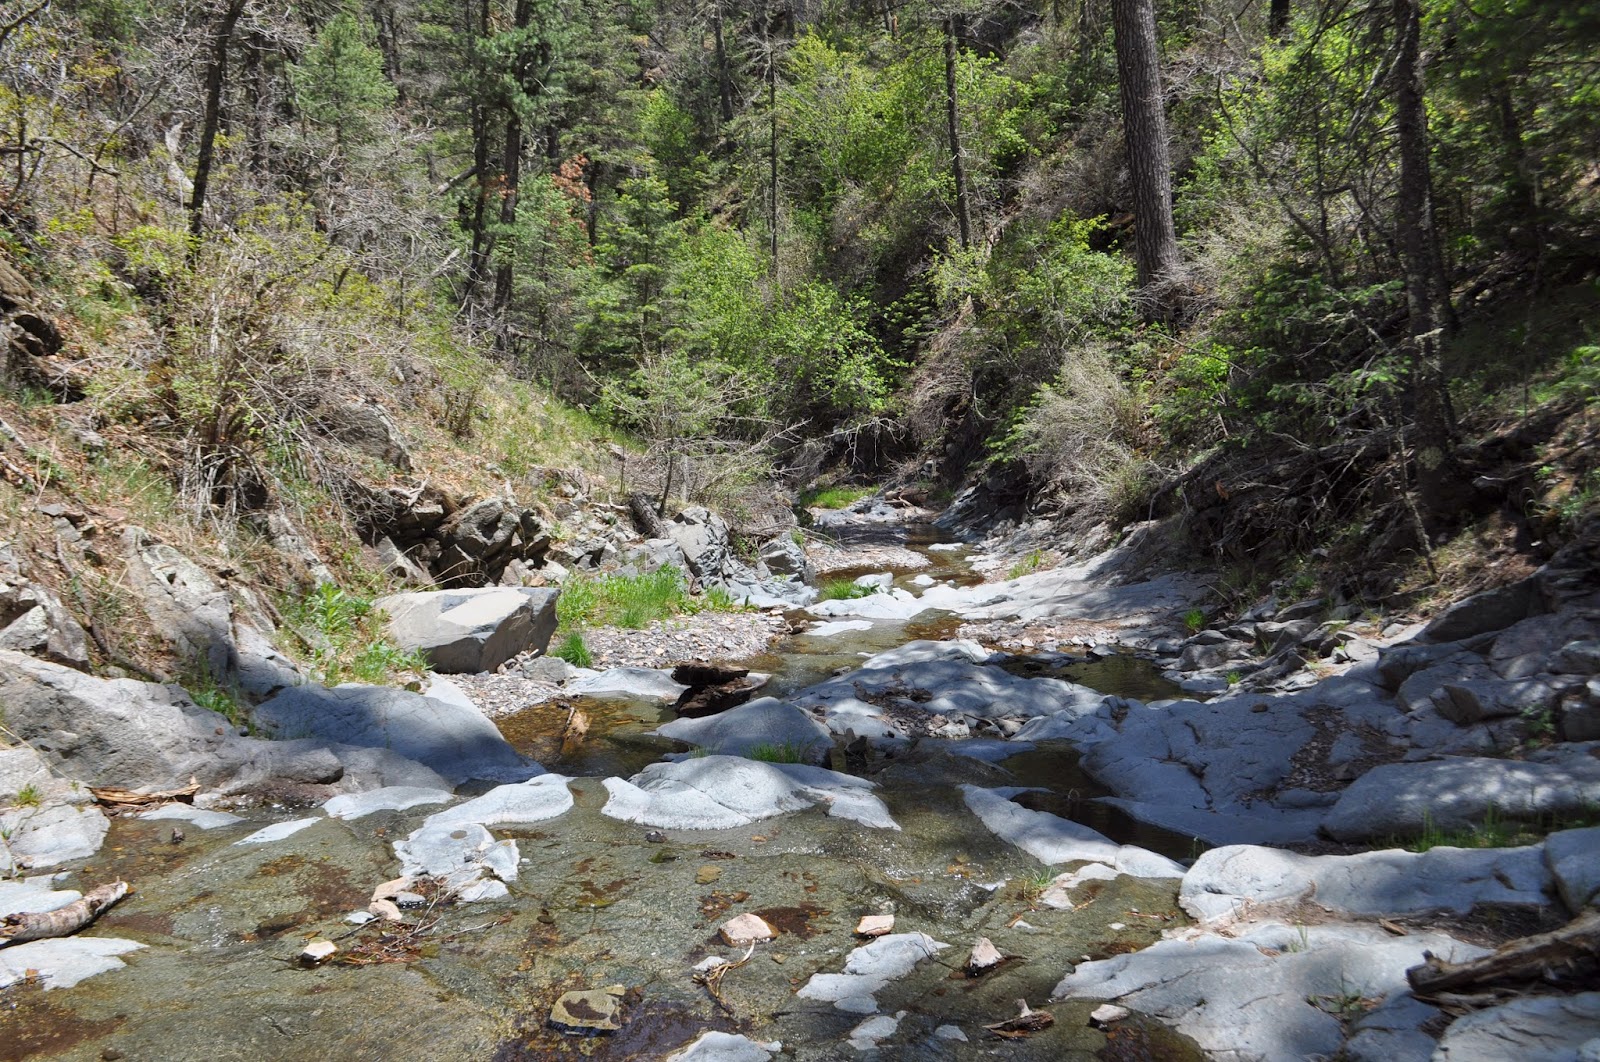
Bonito Lake wasn't our goal. Bonito Trail No. 36 was our goal. And we made it there and hiked it and loved it! Here's a few highlights.

This sign is very important. It shows that we were on the right trail. We have a habit of getting lost on hikes. 

We found a cave. Husband thinks it may have been a mine or claim at one point.
Water! This was the best part of the hike. 
This post is already longer than I thought. I'll stop here and share the rest of the Anniversary Moon highlights another time. I may get a chance to continue documenting our trip in My Digital Studio. 

~Cita 

Monday, May 26, 2014

Thanks in Pink and Black


One of my favorite things to do when making quick and simple cards is to use the Whisper White Notecards and Envelopes (131527, $5.95). This pack comes with 20 envelopes sized 5" x 3-1/2" already scored and ready to be designed. I don't know what it is, but I absolutely love this size of card. I make most of my simple cards using these cards, and I tend to love to use DSP as backgrounds instead of shying away from using so much as a background. It's weird. I tend to hoard DSP. Do you have this problem too?

Stampin' Tips: 

  • Color Scheme: Basic Black, Whisper White, Strawberry Slush, and Coastal Cabana 
  • Stamp Set: A Million and One
  • Accessories: Modern Medley DSP, In Color Boutique Details 
  • Don't be shy to use your DSP as background. One 12x12 sheet of DSP can go a long way with the notecards. 
  • Use a glue dot to adhere the In Color Boutique Details embellishment.

Happy Stampin' 
~Cita 

Tuesday, May 20, 2014

A Colorful Happy (big) Day CASE


I've mentioned before how much I love to CASE other people's work. I rarely ever stick strictly to the original design, but it's a great jumping off point when my creativity is stuck somewhere, and lately I think allergies have been inhibiting the creative juices from flowing. Yay for "Spring" in New Mexico. 

While browsing on Pinterest, I found Carol Lovenstein's cute birthday card and because it used Candy Dots (I had almost a million to use), it caught my eye. And then when I started to make it, I realized this card is a great card to use scraps! After I finished making this card, I looked back and thought: wow, this is a fun card! 

I originally made the card in the landscape orientation, but tried it out in the portrait orientation and liked it so much better. There's all sorts of variations you can do. Go ahead. CASE it!


Stampin' Tips:

  • Colors scheme: Island Indigo, Crushed Curry, Whisper White, Cherry Cobbler, Cajun Craze, Crushed Curry, Elegant Eggplant, Garden Green 
  • Stamp Set: Chalk Talk
  • Accessories: Chevron Embossing Folder, Petite Pennants Builder punch, Chalk Talk framelits, Regals Candy Dots 
  • Frame your Whisper White cardstock by cutting the Crushed Curry cardstock 1/4" bigger than the Whisper White. 
  • Use the non-scalloped pennant from the Petite Pennants Builder punch to cut out the triangles. Position the pennants on the card stock and arrange them to your liking before adhering. I started by positioning the middle pieces (Island Indigo and Cajun Craze) as a starting point. I then positioned the rest of the pennants around these. 
  • Stick a coordinating Candy Dot on each pennant. 
  • Stamp the "Happy Big Day" greeting in Island Indigo and use the coordinating framelit from the Chalk Talk set to cut it. Adhere over the pennants using a Dimensional. 
Another thing I love about this card is that it's a versatile card due to the "Happy Big Day" sentiment. I'm thinking it can be used for graduations, weddings, birthdays, retirements, etc. People have all sorts of big days and I hope they are all happy. 

Happy "Big Day" of Stampin', 
Cita 

Friday, April 18, 2014

Sale-a-Brate a Birthday


I loved this year's Sale-a-Bration stamp sets. And although Sale-a-Bration is over, many of you probably have these amazing sets, like the See Ya Later stamp set, which provides a variety of stamps for different occasions. This was my favorite set this year and I used it on several cards. I love how if you designed one card, you could basically interchange the stamps in this set using the same design.

Stampin' Tips:

  • Color scheme: Marina Mist, Calypso Coral, Whisper White, Strawberry Slush
  • Stamp set: SAB14 See Ya Later
  • Accessories: Apothecary Accents Framelits, SAB Calypso Coral Baker's Twine, Stampin' Write Markers, 5"x3-1/2" Notecards
  • Designer Series Paper: SAB14 Sweet Sorbet
  • Use Stampin' Write Markers to color the stamp. Make sure to give it "the breath of life" before you stamp to moisten the colors. Use the Apothecary Design framelit to cut out the image. 
  • Cut out another Apothecary Design in Marina Mist. Cut this in half and adhere to both ends of the stamped imaged for a layering effect. Adhere these layers to the DSP using Stampin' Dimensionals. 
  • Adhere the Sweet Sorbet DSP to a Marina Mist layer. Before adhering it to the Whisper White card base, wrap the Calypso Coral Baker's Twine around it and finish off with a bow. 
Super simple card on my favorite 5"x3-1/2" Notecards. 

Happy Stampin', 
~Cita 

Friday, April 11, 2014

Yay for Banners


Banners are quite the paper crafting trend lately, and I was slow (as usual) to jump on the bandwagon. But once I bought the Banners Framelits Dies, I was a believer. The reason I broke down and bought this set of framelits was because I really wanted the Perfect Pennants stamp set and you can get both in a bundle for a discounted price (Perfect Pennants Clear-Mount Bundle, 134816, $41.50). I'm a sucker for the bundle & save tactic.

Stampin' Tips: 

  • Colors: Coastal Cabana, Whisper White
  • Stamp Set: Perfect Pennants, Gorgeous Grunge
  • Accessories: Whisper White Baker's Twine, Retro Fresh Washi Tape, Banners Framelits Dies
  • Stamp several of the splatter stamps from the Gorgeous Grunge stamp set in Coastal Cabana ink on Coastal Cabana card stock to create the background. 
  • Use the Retro Fresh Washi Tape to create a little more to the background. Using uneven lengths and making your edges tattered is ideal. 
  • Use washi tape to make the banner flags. Wrap a piece of washi tape around Baker's Twine and then use snips to cut an indent in the bottoms of the washi tape. If you would like to securely position your banner flags, use a glue dot to adhere them in place. 
Happy Stampin'
~Cita

Snowed In

It's like we were destined to not go to school today. I woke up to a beautiful 6 inches of snow in my yard. We are in the lower elevatio...