Showing posts with label Birthday cards. Show all posts

Monday, August 31, 2015

Happy Bokeh Birthday


Have you heard about the Bokeh technique? It's a neat technique that mimics the photographic Bokeh effect which is on trend in photography these days (or so I'm told). The Bokeh effect involves blurring part of the picture that is out of the focal point. I am often drawn to the circles of light that seems to be highlighted in these photographs. Some very talented crafters have adapted this effect to ink and out came a fun technique to use your aqua painters, whisper white craft ink, and circle punches. I have grand plans of writing my own Bokeh technique tutorial, but usually I have grand intentions of doing all sorts of things and nothing ever gets done. I need better time management. Until then, I encourage you to check out a fellow demonstrator's blog for a picture tutorial on how to accomplish the Bokeh technique. 

One of the unique characteristics of the Bokeh technique is the circles, which you can't really see in this picture. I promise they are there. This is one of those cards that I feel that a photograph doesn't portray how cool the card is. Maybe if I was a better photographer I would be able to highlight those Whisper White circles a little bit more. 

Stampin Tips:
  • Colors: Mint Macaroon, Delightful Dijon, Whisper White
  • Apply the Bokeh technique to a 5"x3.75" piece of Whisper White Cardstock. I used Delightful Dijon and Mint Macaroon on my background. 
  • Stamp "Happy Birthday" from the Happy Birthday, Everyone stamp set in versa mark on Vellum. Use gold embossing powder to emboss the greeting. 
  • Use a few glue dots to adhere the vellum to the card. Make sure your Bokeh background has dried. 
  • Cut a few sequins from a piece of Gold Sequin Trim. Use glue dots to adhere to the card. If any of your glue dots underneath your vellum sheet can be seen, use a sequin to cover it.
I had so much fun with this technique. If you have tried this technique, head over to my Facebook page and post a picture of your project. I would love to see how you use the technique.

Happy Stampin',
Carmelita

Built for Free Using: My Stampin Blog


Saturday, August 15, 2015

The Results are In....


This year, I stepped a little out of my comfort zone and entered two cards and a scrapbook layout into the Nevada County Fair. I have never entered any of my work into any contest. Two reasons - I'm usually scared to get my work judged and I'm also too lazy to put the effort into preparing the entry forms, sending off or delivering the entries, or posting the right blog posts to my blog to be judged.

However, this year, since it's such a year of new things and change for our family, I figured I'd give it a shot. Plus, preparing my entries gave my daughter and me something to focus on during our last weeks before school and during the time my husband had to work crazy ridiculous hours. The child entered three items into the fair and I entered three items.

I didn't think I'd be so excited and anxious to see the results, and this past Wednesday, as we attended the fair for the first time, we got to see how our work did.

The Booger had to enter in the Mommy and Me category because she didn't meet the cut-off date to participate in the Youth categories. She received blue ribbons on all her items.

The castle card and the butterfly painting above her are two of three of her entries.

I placed on all three of my items, which I was pretty happy about. I received first place in my class for the scrapbook layout, first place for my Christmas card, and second place for birthday card.
I was quite pleased with the results and was excited that I had placed at all.

First place for Holiday Themed scrapbook layout. Yes, that's my now five-year-old child gracing the spread.


The Snow Flurries stamp set is still one of my favorite sets that I still use a lot even though it is retired. I also love the triple-stamping technique. 


This Coastal Cabana card uses a retired color with current stamp sets. I love the bold bloom flower.


As you can see, I used several retired stamps sets and paper. I have so much retired product laying around that I decided to play with my favorites while preparing for the fair.  In the upcoming weeks, I hope to share with you the different cards I prepared for the fair that didn't get entered.

On another note, the Nevada County Fair is by far the best fair I have ever attended. We had such a great time attending as a family, and there as such a joy that I felt as I watched the booger squeal with delight as she rode ride after ride. The fair also provided an opportunity to learn more about our new community as we strolled through booths that ranged from political affiliations to reading programs to solar companies. And of course, you can't go to the fair without looking at the cute animals. We were quite fond of the pygmy goats.

Is it bad that I'm already starting to think about scrapbook layouts to create for next year's fair? And I can't wait to see the cards I create this upcoming year that may be fair-worthy. Here's to a year of creativity!

Happy Stampin'
~Carmelita

Saturday, August 08, 2015

Playing with the 2015-2017 In-Colors


Every year, we say goodbye to five in-colors so we can greet the five new in-colors. Switching out colors allows Stampin Up! to keep up-to-date with current color trends. In my six years as a Stampin' Up! Demonstrator I have seen so many colors come and go, but it's been neat to see the trends evolve over time.

When the new in-colors are released, I love to watch other demonstrators make card sets to showcase each new color. This year, I thought I would jump on that band wagon. I had so much fun playing with these new colors, and by getting inky with them, I learned to love each one of them in a different way. Seeing these colors in person and on screen are so different. As with most items, pictures don't do these colors justice. You HAVE to see them in person.

This year's in-colors are Watermelon Wonder, Cucumber Crush, Delightful Dijon, Mint Macaroon, and Tip Top Taupe.

I also love the Happy Birthday Everyone stamp set, which is one of five hostess sets you can earn using your Stampin' Rewards (contact me to learn how you can earn these rewards).  The six sayings that accompany the "Happy Birthday" sentiment are perfect to be able to make a card for everyone in your life, including that wonderful man you know.

Here are each color highlighted using the Happy Birthday Everyone, Work of Art, and Kinda Eclectic stamp sets.

Cucumber Crush


Delightful Dijon

Mint Macaroon (my favorite)

Tip Top Taupe (Say that three times fast)

Watermelon Wonder

What do you think of this year's In-Colors? Which one is your favorite? I'm particularly fond of Mint Macaroon, but after playing with each one, I like them all. 

Happy Stampin' 
~Carmelita 

Monday, October 06, 2014

Woohoo for Pinwheels


Project Life! Project Life! Project Life!

These days, I'm obsessed! I've been playing with and thinking about PLxSU so much that I have been having dreams about it the last several nights.

One of the fun things you can do with the PLxSU Card Collections is use the cards on.....wait for it....cards!!!

This card was one of three cards we made during September's Craft It Night. Everyone got their own Playground Card Collection and coordinating accessory kit that they used on the three cards as well as their own PLxSU layout. It was a great night. You can join me for the next one on October 10.

Stampin' Tips:

  • Color scheme: Island Indigo, Calypso Coral, Whisper White
  • Stamp Set: Big News 
  • Accessories:  Playground Project Life Card Collection, Stampin' Dimensionals
  • Cut the pinwheel card to 3.75" x 5"
  • Stamp the "woohoo" stamp in Island Indigo on Whisper White card stock. Use paper snips to cut out the banner and use a Stampin' Dimensional to adhere it to the card. 

Tuesday, May 20, 2014

A Colorful Happy (big) Day CASE


I've mentioned before how much I love to CASE other people's work. I rarely ever stick strictly to the original design, but it's a great jumping off point when my creativity is stuck somewhere, and lately I think allergies have been inhibiting the creative juices from flowing. Yay for "Spring" in New Mexico. 

While browsing on Pinterest, I found Carol Lovenstein's cute birthday card and because it used Candy Dots (I had almost a million to use), it caught my eye. And then when I started to make it, I realized this card is a great card to use scraps! After I finished making this card, I looked back and thought: wow, this is a fun card! 

I originally made the card in the landscape orientation, but tried it out in the portrait orientation and liked it so much better. There's all sorts of variations you can do. Go ahead. CASE it!


Stampin' Tips:

  • Colors scheme: Island Indigo, Crushed Curry, Whisper White, Cherry Cobbler, Cajun Craze, Crushed Curry, Elegant Eggplant, Garden Green 
  • Stamp Set: Chalk Talk
  • Accessories: Chevron Embossing Folder, Petite Pennants Builder punch, Chalk Talk framelits, Regals Candy Dots 
  • Frame your Whisper White cardstock by cutting the Crushed Curry cardstock 1/4" bigger than the Whisper White. 
  • Use the non-scalloped pennant from the Petite Pennants Builder punch to cut out the triangles. Position the pennants on the card stock and arrange them to your liking before adhering. I started by positioning the middle pieces (Island Indigo and Cajun Craze) as a starting point. I then positioned the rest of the pennants around these. 
  • Stick a coordinating Candy Dot on each pennant. 
  • Stamp the "Happy Big Day" greeting in Island Indigo and use the coordinating framelit from the Chalk Talk set to cut it. Adhere over the pennants using a Dimensional. 
Another thing I love about this card is that it's a versatile card due to the "Happy Big Day" sentiment. I'm thinking it can be used for graduations, weddings, birthdays, retirements, etc. People have all sorts of big days and I hope they are all happy. 

Happy "Big Day" of Stampin', 
Cita 

Friday, April 18, 2014

Sale-a-Brate a Birthday


I loved this year's Sale-a-Bration stamp sets. And although Sale-a-Bration is over, many of you probably have these amazing sets, like the See Ya Later stamp set, which provides a variety of stamps for different occasions. This was my favorite set this year and I used it on several cards. I love how if you designed one card, you could basically interchange the stamps in this set using the same design.

Stampin' Tips:

  • Color scheme: Marina Mist, Calypso Coral, Whisper White, Strawberry Slush
  • Stamp set: SAB14 See Ya Later
  • Accessories: Apothecary Accents Framelits, SAB Calypso Coral Baker's Twine, Stampin' Write Markers, 5"x3-1/2" Notecards
  • Designer Series Paper: SAB14 Sweet Sorbet
  • Use Stampin' Write Markers to color the stamp. Make sure to give it "the breath of life" before you stamp to moisten the colors. Use the Apothecary Design framelit to cut out the image. 
  • Cut out another Apothecary Design in Marina Mist. Cut this in half and adhere to both ends of the stamped imaged for a layering effect. Adhere these layers to the DSP using Stampin' Dimensionals. 
  • Adhere the Sweet Sorbet DSP to a Marina Mist layer. Before adhering it to the Whisper White card base, wrap the Calypso Coral Baker's Twine around it and finish off with a bow. 
Super simple card on my favorite 5"x3-1/2" Notecards. 

Happy Stampin', 
~Cita 

Friday, April 11, 2014

Yay for Banners


Banners are quite the paper crafting trend lately, and I was slow (as usual) to jump on the bandwagon. But once I bought the Banners Framelits Dies, I was a believer. The reason I broke down and bought this set of framelits was because I really wanted the Perfect Pennants stamp set and you can get both in a bundle for a discounted price (Perfect Pennants Clear-Mount Bundle, 134816, $41.50). I'm a sucker for the bundle & save tactic.

Stampin' Tips: 

  • Colors: Coastal Cabana, Whisper White
  • Stamp Set: Perfect Pennants, Gorgeous Grunge
  • Accessories: Whisper White Baker's Twine, Retro Fresh Washi Tape, Banners Framelits Dies
  • Stamp several of the splatter stamps from the Gorgeous Grunge stamp set in Coastal Cabana ink on Coastal Cabana card stock to create the background. 
  • Use the Retro Fresh Washi Tape to create a little more to the background. Using uneven lengths and making your edges tattered is ideal. 
  • Use washi tape to make the banner flags. Wrap a piece of washi tape around Baker's Twine and then use snips to cut an indent in the bottoms of the washi tape. If you would like to securely position your banner flags, use a glue dot to adhere them in place. 
Happy Stampin'
~Cita

Thursday, January 02, 2014

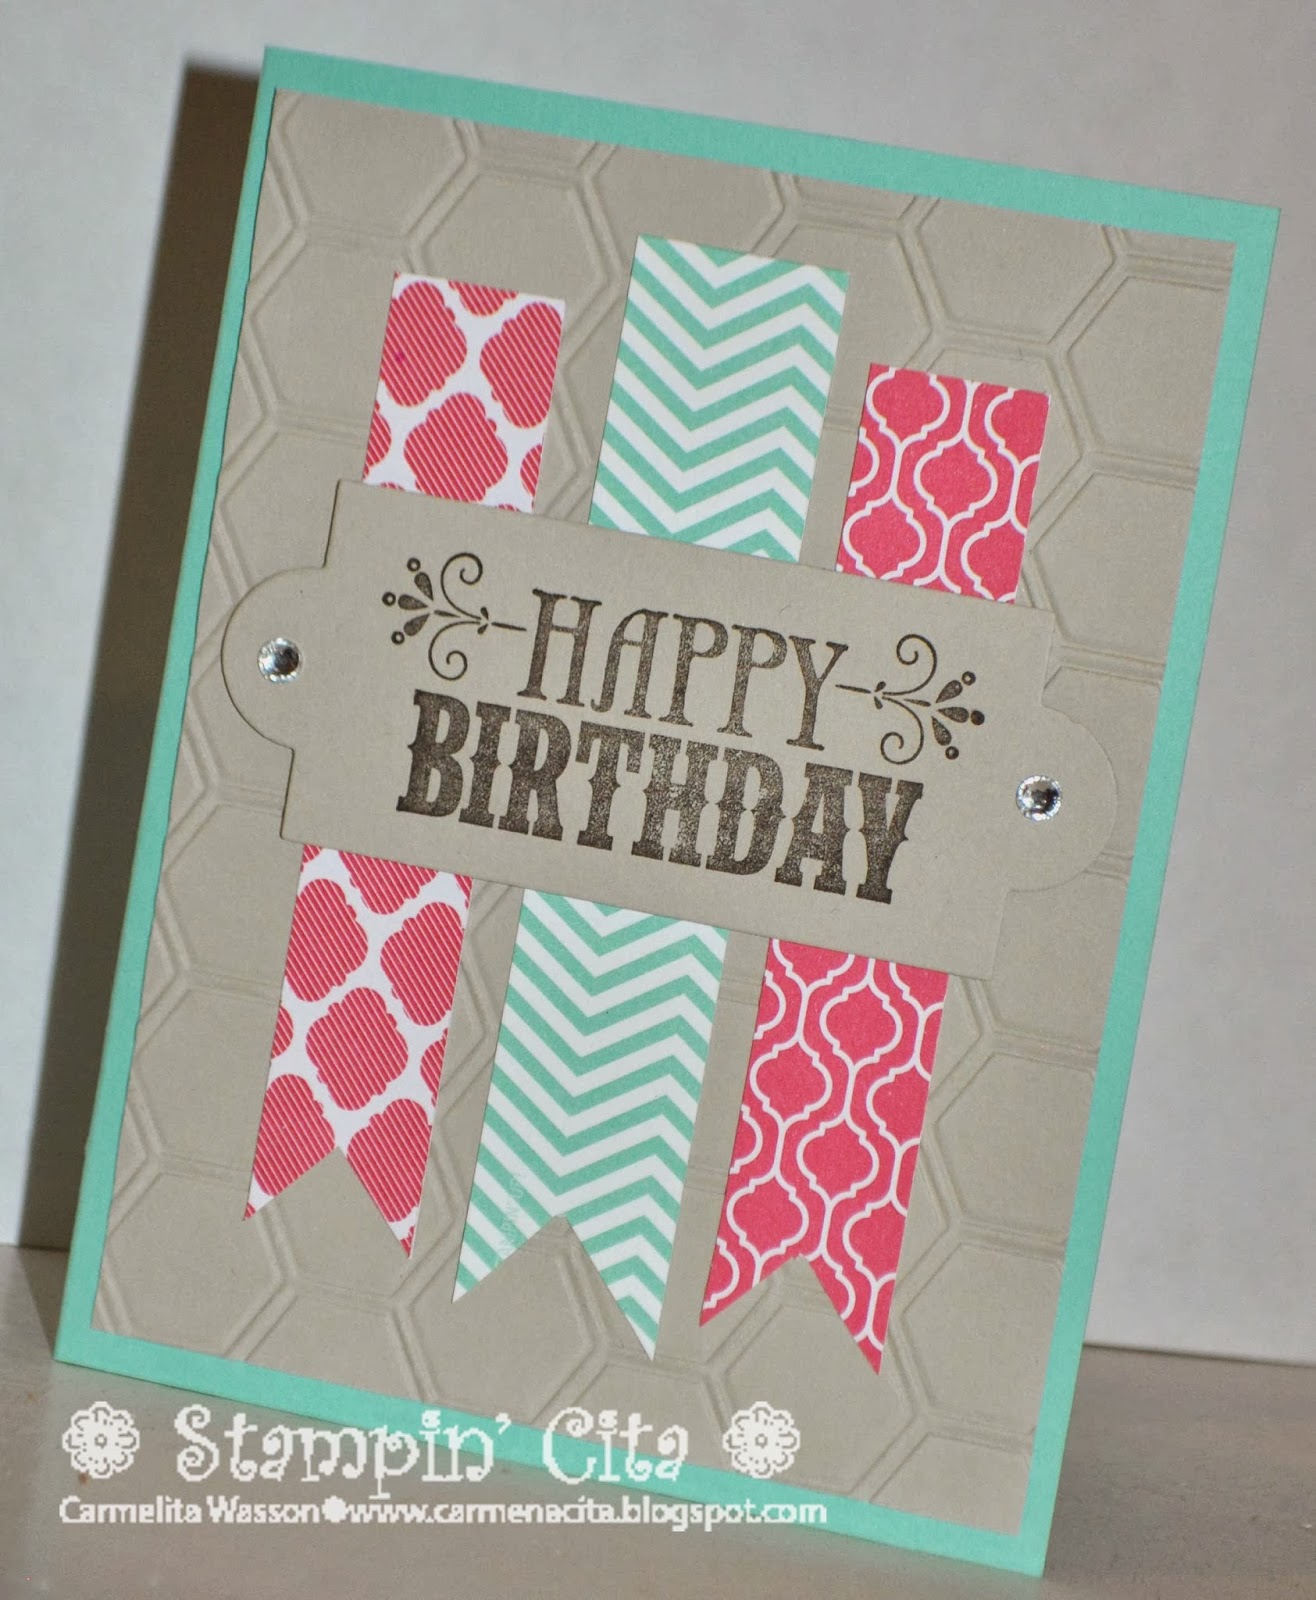
Mosaic Birthday CASE


In my eyes, being CASEd is one of greatest form of compliments I can receive from a fellow stamper. Next to being CASEd in being pinned on Pinterest. I found this card on Pinterest awhile ago and CASEd it for an In-Color class I held last summer. Turns out that this card is a case of a case. I couldn't find the original designer of this card, so if you are out there and come across this, thank you for your amazing creativity. 

Stampin' Details:
  • Colors: Coastal Caban, Crumb Cake, Strawberry Slush, Early Espresso
  • Stamp Set: You're Amazing
  • Embellishments: Rhinestones Basic Jewels
  • Big Shot: Honeycomb Embossing Folder, Apothecary Accents Framelits 
  • Use the debossed side of the Honeycomb embossed Crumb Cake (the side that indents instead of sticks up).
  • Cut strips of 1" and 1-1/4" of In-Color DSP. Cut a ribbon end on the bottom of each strip. 
  • Remember to stamp first, and then cut the apothecary accent shape based on the stamped image. Using the magnetic platform makes this step super easy. 
  • Embellish the sides of the apothecary accent shape with rhinestones or whatever embellishment you have on hand. The Candy Dots would be a good alternative. 
Happy Stampin'
~Cita 


Friday, April 12, 2013

Ladybug Ink Blog Hop: Birthday Style

Welcome to the April Ladybug Ink Blog Hop!
My birthday is this weekend, so it's awesome that our fearless Blog Hop organizer, Ruth, chose the birthday theme for this month's theme. I feel like I can continue to celebrate my birthday as I look at all the amazing birthday projects that these talented Ladybug stampers have come up with.
Anyways, my card is CASEd from a swap I received from a very talented demonstrator, T. Butts at the 2012 Stampin' Up! Denver Regional. Thank you for the inspiration.
I love this birthday card because of it's clean, simple look and the bold birthday colors (Pacific Point, Real Red, and Daffodil Delight).
The gift bags are simple to make, but takes longer than you may think.
  • Take pieces of Real Red, Pacific Point, and Daffodil Delight cardstock and use the Chevron embossing folder to emboss each color. 
  • Use the 1-1/4" Square Punch to punch out the squares in each color. 
  • Use the stampin' sponges to sponge each square's respective color over the chevrons. 
  • Cut a little piece (about1-1/2") piece of baker's twine and attach it to the back of each square using scotch tape. Using scotch tape better holds the twine in place. 
  • Sponge each color on white tissue paper. Fold or crumble the pieces and attach to the back of each square using scotch tape. 
  • Attach the newly assembled gift bag to your card using Stampin' Dimensionals. 
I stamped  "Happy Birthday" from the Sassy Salutation stamp set in Pacific Point ink. You may not be able to see this very clearly in the picture, but I also added a little more chevron embossing between the "Happy Birthday" and the gift bags by using the Borders Scoring Plate and the Simple Scored tool.

Isn't this a fun card? I like it so much, I think I'm going to give it to myself for my birthday this weekend. :-D

Head on over to Cassie's blog to see what kind of birthday awesomeness she has in store for you!

Happy Stampin',
~Cita 


Blog Hop Roll Call:

 Ruth Norton http://ruthsstampingcorner.blogspot.com
Nichole Gonzales Jaramillo http://nicholesu.blogspot.com/
You are here: Camelita Wasson http://carmenacita.blogspot.com/


Sunday, September 16, 2012

Remembering Cupcakes


Once upon a time, I met a Stampin' Up! demonstrator who invited me to her stamp club. After much hesitation, I excitedly joined the club. One of the first projects I ever completed in this stamp club used the now-retired Crazy for Cupcakes stamp set. Guess what I did? I bought that stamp set and never used it again. That's a flat out lie, but it sounded funny in my head, because how many of us have ever fallen in love with a stamp set, bought it, and then let it sit on our craft desk collecting dust for years? Anyways, even though the Crazy for Cupcakes is long gone, I wanted to share this beautiful card with you just in case you still have the Crazy for Cupcakes stamp set sitting somewhere collecting dust.

Stampin Cita' Tips:

  • Color scheme: Pink Pirouette, Chocolate Chip, Whisper White
  • Stamp Sets: Crazy for Cupcakes (retired), Fresh Vintage (Sale-a-Bration 2012)
  • When using framelits, stamp the image first and then place the framelit on top to cut it out. This will allow you to get the perfect position. If your framelit moves, use a sticky note to temporarily attach it to the paper. 
  • To get the oval frame for the Labels Framelits, just cut out two ovals using the small oval punch and adhere them to the back of Labels framelit with the cupcakes. 
  • Use Dazzling Diamonds to color the cupcakes' frosting. I think glitter makes these cupcakes look scrumptious. mmm cupcakes sound good right about now. 
Hope you enjoy this blast from the not so distant past. 
~Cita 

Thursday, September 29, 2011

Who Who Who is Having a Birthday?


I'm once again reminiscing about the 2011 Sale-a-Bration stamp sets. I loved loved loved the sets this past year, and I refuse to get rid of some of them. Such as the SAB Punch Bunch set. Nope. Never. I'm not getting rid of it. And one of the reasons is the owl image. It's so STINKIN Cute. And then you can easily punch him (or her) out with the Owl Punch, use some DSP to dress him up, and then adhere him to almost any type of card. In this case, Mr. Owl went to a birthday party at my spring stamp-a-stack. 

Stampin' Cita Tips:
  • Stamp Sets: SAB 2011 Punch Bunch, Party Hearty (retired)
  • Color scheme: Pacific Point, Baja Breeze, Real Red, Very Vanilla, Chocolate Chip 
  • Accessories: Owl Punch, Scallop Square Duo Bigz Die, Perfect Polka Dots Textured Impressions Embossing Folder Die, Silver Brads, Modern Label punch.
  • Use the Scallop Square Duo Bigz Die to cut out the bigger scalloped square. Then, use the Perfect Polka Dot Textured Impressions Embossing folder to emboss the polka dots on the scalloped square. 
  • Stamp the owl image three times in Chocolate Chip. Use the Owl Punch to punch out each owl. Take a piece of scrap DSP and punch out a "body" from the Owl Punch. Adhere that to one of the owls. On that same "dressed up" owl, use Stampin' Write markers to color its eyes and beak. 
  • Use Stampin' Write markers to color one of the birthday hats on the Party Hearty stamp set birthday hats stamp. Remember to "huff" on it before stamping the image to make sure the ink isn't completely dry. Cut out the birthday hat with some Snips and adhere it to the head of the "dressed up" owl. 
  • Stamp the "Pearty Hearty" greeting in Real Red on Whisper White and punch out the greeting using the Modern Label punch. Use a paper piercer to pierce two holes in each side of the modern label and insert silver brads. Attach using dimensionals.   
Overall, this is a simple card, but if you want to mass produce this card, stamper beware. The polka dot scallop can take some time since you can only run one scallop square in the embossing folder at a time. 

Happy Stampin'!
~Cita   

    Tuesday, September 27, 2011

    Punch Out Birthday


    Here's another card from the 2011 Sale-a-Bration timeframe. I love how the Punch Bunch stamp set would help to make simple cards, such as this birthday card. Three stamps, punch, DSP, and a little ribbon, and wa-la a cute, simple birthday card that could be used for a boy or girl.

    Stampin Cita Tips:
    • Stamp Sets: 2011 SAB Punch Bunch 
    • Color Scheme: Real Red, Pacific Point
    • Accessories: Brights Patterns DSP, Real Red 1/8" Taffeta Ribbon, Scallop Square Punch 
    • Stamp the "happy birthday" image three times in Real Red and then once in Pacific Point. Punch out the three Real Red images with the Scallop Square punch and then cut out the middle square of the Pacific Point image. Adhere the Pacific Point square to one of the Real Red images. 
    • Adhere your piece of DSP to the Pacific Point card base. Adhere two pieces of Real Red 1/8" Tafetta Ribbon to the DSP parallel to each other.
    Super easy, huh?

    Happy Stampin'
    ~Cita

      Tuesday, July 26, 2011

      Doilies Aren't for Old People

      The Delicate Doilies stamp set was one of the sets that Stampin' Up! offered to us demonstrators as a sneak peak item in June. When I first saw it I was not to thrilled with this set. But for some weird reason, I ended up buying it, and I haven't really been able to put it down for the last two months. I did decide that one reason I was so turned off to stamp set was because it had doilies in its name. I think of my Grandma's bright yellow doilies when I think of doilies. And although those doilies are amazing, I think old people (no offense wiser, older generation. I have lots of respect for you and your doilies). However, once I got past the name, I'm obsessed with this set. 

      I made this card for the June Ladybug Ink card swap. I CASEd it from a fellow demonstrator I found on Stampin' Connection. This color scheme is definitely out of my comfort zone, but I ended up loving it. I hope you enjoy it too. 

      Stampin' Cita Tips: 
      • Stamp Sets: Delicate Doilies, Upsy Daisy, Strength & Hope
      • Color Scheme: Peach Parfait, Poppy Parade, Wisteria Wonder, Chocolate Chip, Whisper White, Concord Crush
      • Accessories:Decorative Label Punch, 1/2" Scallop Dots Ribbon Chocolate Chip
      • Stamp the doily images using Peach Parfait, Poppy Parade, and Wisteria Wonder. Focus on the middle of the card concentrating the images from corner to corner. Don't be afraid to overlap some of the images. 
      • Layer the Whisper White Cardstock on top of of the Poppy Parade cardstock. Wrap a piece of Chocolate Chip 1/2" Scallop Dots Ribbon in each corner.
      • To create the greeting, stamp the words from Strength & Hope in Wisteria Wonder ink on a piece of Wisteria Wonder cardstock. Stamp the birthday greeting from the Upsy Daisy stamp set in Concord Grape over the words. Use the Decorative Label punch to punch out the greeting and then use a sponge to add a little of Concord Grape around the edges. Adhere the greeting to your card using a Stampin' Dimensional.
      Happy Stampin'
      ~Cita

        Wednesday, June 15, 2011

        So Happy For You


        This past Sale-a-Bration season was amazing. I loved all the sets and all the free stuff that I earned during this awesome event. As a demonstrator, I even earned a free stamp set in addition to all the ones I earned during the promotion. I have until the middle of July to pick my stamp set; I'm waiting for the new catalog to be available so I can get a set out of that catalog. Another perk of being a demonstrator is all the free product you can earn through different contests and incentive programs. 

        Anyways, I talk about Sale-a-Bration  because the cards in this posting feature the Sale-a-Bration So Happy for You stamp set. This was such a cute, versatile set that I'm holding on to (I'm currently going through my stamp sets and getting rid of the sets that are "retired" and I no longer use). 

        Stampin' Cita Tips:
        • Color scheme: Crumb Cake, Elegant Eggplant, Pumpkin Pie, and Rose Red
        • Stamp Set: SAB 2011 So Happy For You
        • Accessories: Stampin' Dimensionals, Natural Hemp Twine, Filigree Brad, Sponge
        • Stamp the star image in Pumpkin Pie three times on Whisper White. Then on a scrap piece of Whisper White cardstock, stamp the star image again in Elegant Eggplant and then two more times in Rose Red. Cut out just the star image (not the tail) and use a Stampin' Up! dimensional to place the star cut out on the Pumpkin Pie star images. 
        • Use a sponge to sponge Rose Red around the piece of Whisper White. Adhere this piece onto a piece of Elegant Eggplant. 
        • Use a paper piercing tool to punch a hole for the Filigree Brad. Once the Filigree brad is in place, wrap the Hemp Twine around the Filigree brad and adhere to the back of the Elegant Eggplant piece with scotch tape. 
        • Adhere the Elegant Eggplant piece to the Crumb Cake card base (which is 4"x4"), then stamp any of the wonderful sentiments from the So Happy for You stamp set. 
        I'm all about designing cards that can be used for a variety of events, and what's great about this card is that you can use this design for pretty much any sentiment included in the So Happy for You stamp set.

        Happy Stampin'!
        ~Cita

        Sunday, May 09, 2010

        Simple Birthday

        Simple cards are great. They are quick and easy and can still say and mean a lot. I made this card for a customer of mine and thought for a simple card it's pretty.

        Simple Birthday Card details:
        • Color scheme: Pretty in Pink, Perfect Plum, Whisper White, and Rose Red
        • Use the Fast Flower Stampin' Wheel with Pretty in Pink to get the flowers across the Whisper White piece. After that, clean your wheel, roll it through Versamark, and then apply the wheel again. Before the Versamark dries, add some Iridescent Ice embossing powder and emboss it using a heat tool
        • Use the scallop punch to punch out a scallop and then cut between each scallop to get a flower. Stamp the flower from the Hello Again stamp set and cut it out. Adhere it to the middle of your scallop flower.
        • The birthday greeting is from Upsy Daisy
        Happy Stampin'
        ~Cita

        Snowed In

        It's like we were destined to not go to school today. I woke up to a beautiful 6 inches of snow in my yard. We are in the lower elevatio...